How to Change Differential Fluid on a Xterra (Front & Rear)
Change front and rear differential fluid on a Nissan Xterra (2000-2015): correct GL-5 specs and capacities by generation, drain/fill torque, and key tips.

One-tap dark, screen-awake, step-by-step reading for hands-on work.
How to Change Differential Fluid on a Nissan Xterra (Front & Rear)
The Nissan Xterra is a legend in the off-road and overlanding communities, known for its rugged, body-on-frame construction and dependable drivetrain. At the heart of that tough drivetrain are the differentials, the components responsible for transferring power to your wheels. To keep them running smoothly, whether you're navigating city streets or tackling a rocky trail, regular differential fluid changes are non-negotiable. This critical maintenance task is often overlooked, leading to unnecessary wear, gear noise, and potentially catastrophic failure down the road.
While taking your Xterra to a shop is always an option, changing the differential fluid is a straightforward and rewarding DIY project that can save you money and give you a deeper understanding of your vehicle. It's a job that requires just a few common tools and a bit of patience. Neglecting this service allows old, broken-down gear oil to leave your differential's internal components vulnerable to heat and friction, especially under heavy loads like towing or aggressive off-roading.
This comprehensive guide will walk you through every step of a Nissan Xterra differential fluid change. We’ll cover the specific fluid types and capacities for both first and second-generation models, list the essential tools you'll need, and provide a detailed, step-by-step process for both the front and rear differentials. By the end, you'll have the confidence and knowledge to protect one of your Xterra's most vital systems.
Why is Changing Your Xterra's Differential Fluid So Important?
Before we get our hands dirty, it's helpful to understand what your differentials do and why the fluid inside them is so critical. A differential is a complex set of gears that allows the wheels on the same axle to rotate at different speeds, which is essential for making turns. This process generates immense pressure and heat, and the gear oil is the only thing protecting the metal components.
Protects Against Wear and Tear
Gear oil is a thick, high-viscosity lubricant designed to withstand extreme pressure. Over time, it breaks down and becomes contaminated with microscopic metal particles from normal gear wear. Changing the fluid removes these abrasive particles and replenishes the protective additives, preventing premature wear on the ring and pinion gears.
Maintains Drivetrain Performance
Fresh fluid ensures smooth, quiet operation. Old, burnt fluid can lead to whining or humming noises from the differentials, a common sign of trouble. For 4WD Xterras, especially those with the electronic locking rear differential (Pro-4X models), using the correct fluid is crucial for the proper function of the locking mechanism.
Prevents Costly Repairs
A differential fluid change is one of the most cost-effective pieces of preventative maintenance you can perform. The cost of a few quarts of gear oil and some crush washers is minuscule compared to the price of rebuilding or replacing a differential, which can run into thousands of dollars.
Recommended Differential Fluid Types and Capacities for Nissan Xterra
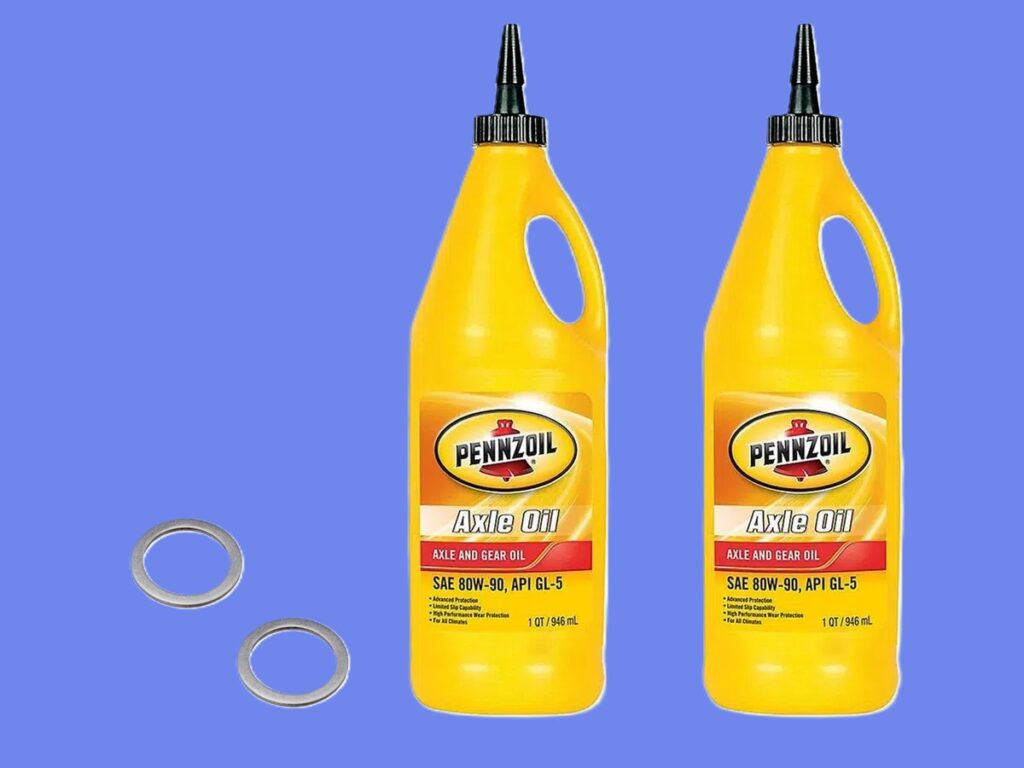
One of the most critical aspects of this job is using the correct type and amount of gear oil. The requirements for Nissan Xterras vary significantly between the first (2000–2004) and second (2005–2015) generations, and even between 2WD and 4WD models. Always use a high-quality API GL-5 rated gear oil.
To simplify things, here is a quick-reference table with all the necessary specifications.
| Generation | Model | Differential | Fluid Specification | Fluid Capacity |
|---|---|---|---|---|
| 1st Gen (2000-2004) | 2WD | Rear | API GL-5 80W-90 | ~1.3 L (1.4 US qt) |
| 4WD | Front | API GL-5 80W-90 | ~1.4 L (1.5 US qt) | |
| 4WD | Rear | API GL-5 80W-90 | ~2.8 L (3.0 US qt) | |
| 2nd Gen (2005-2015) | 2WD | Rear | API GL-5 75W-90 (Synthetic) | ~1.6 L (1.7 US qt) |
| 4WD | Front | API GL-5 80W-90 | ~0.85 L (0.9 US qt) | |
| 4WD (e-locker) | Rear | API GL-5 75W-140 (Synthetic) | ~2.0 L (2.1 US qt) |
First Generation Xterra (2000–2004)
For first-generation Xterras, the fluid choice is simple. All differentials, both front and rear on 4WD models and the single rear diff on 2WD models, specify API GL-5 80W-90 hypoid gear oil. Nissan's OEM fluid is called "Differential Gear Oil Hypoid Super," but any quality brand meeting this spec will work perfectly.
Second Generation Xterra (2005–2015)
The second-generation models have more specific requirements. The front differential on 4WD models still uses API GL-5 80W-90. However, the rear differential fluid changes.
- 2WD Models: Use a synthetic API GL-5 75W-90 gear oil.
- 4WD Models (Pro-4X/Off-Road Trim): These models are equipped with an electronic locking rear differential and require a synthetic API GL-5 75W-140 gear oil. Using a lighter weight oil can cause improper locker function and accelerated wear.
Important Note: Using 75W-140 in a second-gen 4WD Xterra rear differential is mandatory for models with the electronic locker. Do not substitute a different weight.
OEM vs. High-Quality Aftermarket Fluids
While Nissan's branded gear oils are excellent, many high-quality synthetic aftermarket options from brands like Mobil 1, Red Line, Royal Purple, and AMSOIL meet or exceed the factory specifications. For example, Red Line's 75W-90 is a popular choice for vehicles calling for 80W-90, and their 75W-140 is perfect for the demanding Pro-4X rear axle.
Essential Tools and Materials for the Job
Gathering everything you need before you start will make the process much smoother. This is a messy job, so be prepared with plenty of rags and cardboard to protect your work surface.
Here is a checklist of what you'll need:
- Safety Gear:
- Floor Jack (3-ton capacity recommended)
- Jack Stands (rated for 3+ tons)
- Wheel Chocks
- Safety Glasses & Nitrile or Mechanic's Gloves
- Tools:
- Metric Socket Set and Wrench Set
- Breaker Bar (for stubborn plugs)
- Torque Wrench (highly recommended for accuracy)
- Fluid Transfer Pump or a Funnel with a Flexible Hose
- Large Oil Drain Pan (5+ quart capacity)
- Parts and Supplies:
- The correct type and quantity of API GL-5 gear oil for your specific Xterra model (buy an extra quart just in case).
- New Drain and Fill Plug Gaskets/Washers. Do not reuse the old ones.
- Drain Plug Crush Washer: Nissan P/N 11026-JA00A
- Fill Plug Gasket: Nissan P/N 11026-4N200
- Shop Rags or Paper Towels
Step-by-Step Guide to Changing Your Xterra's Differential Fluid
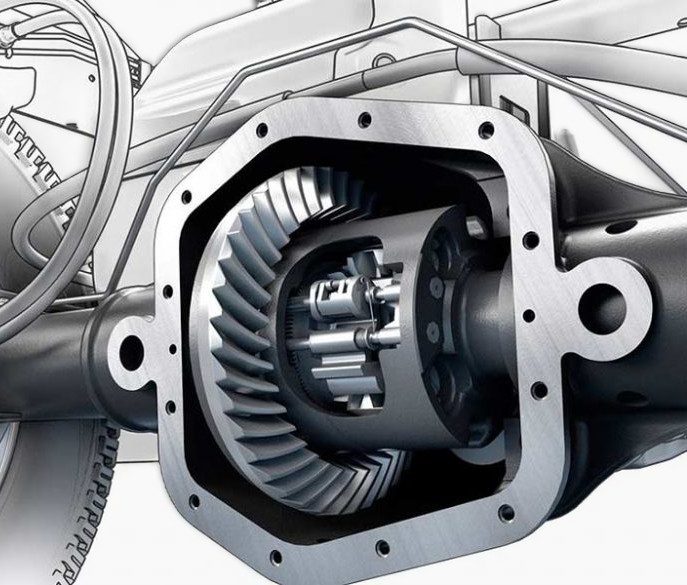
With your tools gathered and your new fluid ready, it's time to get started. The process is the same for both the front and rear differentials. Remember to work on a level surface and prioritize safety at every step. If you have a 2WD Xterra, you will only be servicing the rear differential.
- Prepare and Secure the Vehicle
Park on a flat, level surface, engage the parking brake, and place wheel chocks behind the wheels you are not lifting. Use your floor jack to lift the vehicle at the proper lift points (check your owner's manual) and securely place jack stands under the frame rails. Never work under a vehicle supported only by a jack. - Locate the Differentials and Plugs
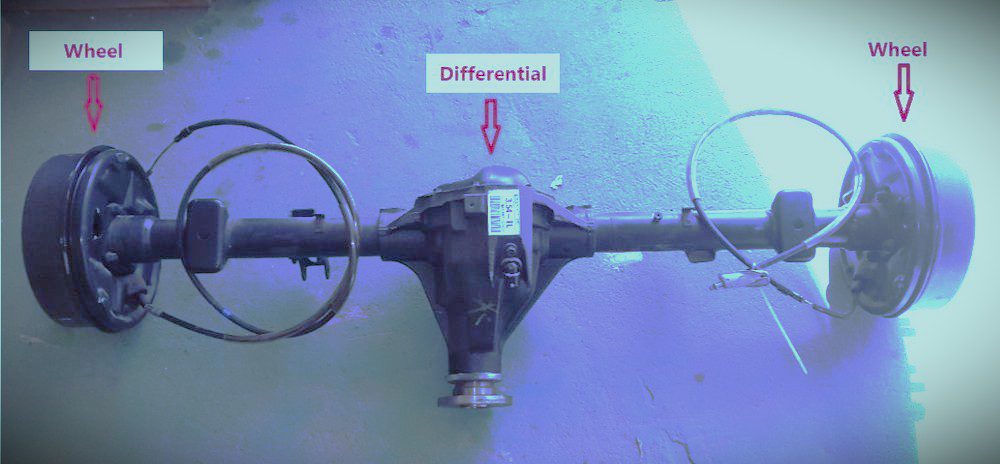
The rear differential is the large, pumpkin-shaped housing in the center of the rear axle. The front differential on 4WD models is located at the front of the vehicle between the two front wheels. Each differential has two plugs: a fill plug located on the side or cover (midway up) and a drain plug at the very bottom. - Break Loose the Fill Plug First
This is the most important step! Before draining any fluid, use your socket or wrench to break loose the fill plug. If you drain the fluid and then discover you can't remove the fill plug, you'll be unable to refill the differential and your Xterra will be stranded. Loosen it a full turn, but don't remove it yet. - Drain the Old Fluid
Position your drain pan directly under the drain plug. Remove the drain plug completely and allow the old, thick gear oil to drain out. It may flow slowly, so give it at least 15-20 minutes to drain completely. - Inspect Old Fluid and Clean the Drain Plug
While the fluid drains, inspect it. A dark color is normal, but if you see shiny metallic flakes or large metal chunks, it could be a sign of internal damage that requires a professional diagnosis. Clean the drain plug thoroughly. If it's magnetic, wipe off all the fuzzy metallic paste that has collected on it. - Install the New Drain Plug Washer and Torque to Spec
Once the dripping has stopped, wipe the drain hole area clean. Place the new crush washer (P/N 11026-JA00A) on the clean drain plug. Thread it in by hand to avoid cross-threading, then tighten it with your torque wrench to 25-29 ft-lb (35-40 N·m). Do not overtighten! - Refill with Fresh Gear Oil
Remove the fill plug you loosened earlier. Using your fluid pump or funnel-and-hose combination, slowly pump the new gear oil into the fill hole. Continue filling until the fluid reaches the bottom of the fill hole and a small amount begins to weep out. This is how you know it's full. - Reinstall the Fill Plug with a New Gasket
Wipe the fill hole area clean. Place the new gasket (P/N 11026-4N200) on the fill plug, thread it in by hand, and tighten it to the same torque spec: 25-29 ft-lb. - Repeat for the Second Differential (4WD Models)
If you have a 4WD Xterra, move your drain pan to the front differential and repeat steps 2 through 8. Remember to use the correct fluid type for the front differential. - Clean Up and Lower the Vehicle
Wipe down both differential housings to remove any spilled oil. This will make it easier to spot any potential leaks later. Carefully lower your Xterra off the jack stands, remove the wheel chocks, and take it for a short test drive. Properly dispose of the used gear oil by taking it to an auto parts store or local recycling center.
Tips & Tricks for a Smoother Job
Here are a few professional tips to make your Nissan Xterra differential fluid change even easier and more effective.
- Warm Up the Fluid First. Thick, cold gear oil drains incredibly slowly. Drive your Xterra for 5-10 minutes before starting the job. This warms up the fluid, lowers its viscosity, and allows it to drain much faster and more completely.
- A Fluid Pump is Your Best Friend. While a funnel and hose can work, a simple fluid transfer pump that screws onto the gear oil bottle is a game-changer. It makes refilling the differentials, especially the front one with limited access, a clean, quick, and spill-free process.
- Always Buy New Gaskets Ahead of Time. Don't wait until you're under the truck to realize you need new crush washers. Order the OEM Nissan part numbers (11026-JA00A for the drain, 11026-4N200 for the fill) online or from a dealer beforehand. They are cheap insurance against frustrating leaks.
- Inspect Your Breather Vents. While you're working under your Xterra, locate the differential breather vents. These are small caps on the end of a rubber hose connected to the top of each axle housing. Ensure they are not clogged with mud or debris, as a clogged breather can cause pressure to build up and blow out your axle seals.
FAQ - Frequently asked questions
Why is it important to change my Nissan Xterra’s differential fluid?
Changing the differential fluid removes metal particles and replenishes protective additives, preventing gear wear, drivetrain noise, and costly repairs.What type of differential fluid does my Xterra need?
First-gen (2000–2004) models use API GL-5 80W-90. Second-gen (2005–2015): 2WD–API GL-5 75W-90 (synthetic); 4WD front–API GL-5 80W-90; 4WD rear with e-locker–API GL-5 75W-140 (synthetic).How much differential fluid does an Xterra require?
Capacities vary: 1st Gen rear (2WD): ~1.3 L; front (4WD): ~1.4 L; rear (4WD): ~2.8 L. 2nd Gen rear (2WD): ~1.6 L; front (4WD): ~0.85 L; rear (4WD e-locker): ~2.0 L.What tools and supplies are needed for a differential fluid change?
You’ll need: safety gear, jack and jack stands, chocks, socket/wrench sets, torque wrench, fluid pump or funnel, drain pan, correct gear oil, and new drain/fill plug gaskets.What are the torque specs for the drain and fill plugs?
Tighten both plugs with new washers to 25-29 ft-lb (35-40 N·m). Avoid overtightening to prevent damage.How do I ensure I don’t overfill or underfill the differential?
Fill until fluid just begins to seep from the fill hole with the vehicle level. This ensures proper level according to manufacturer guidelines.Do I need to replace the crush washers and gaskets every time?
Yes, always use new OEM Nissan crush washers (P/N 11026-JA00A and 11026-4N200) on the drain and fill plugs to prevent leaks.How often should I change the differential fluid?
Nissan recommends changing every 30,000–50,000 miles for severe use, or as indicated in your owner’s manual. More often if towing or off-roading regularly.Conclusion: Protecting Your Xterra for the Long Haul
Congratulations! You've just completed one of the most essential maintenance tasks for your Nissan Xterra. By changing your differential fluid, you have not only saved money but have also taken a proactive step in preserving the health and longevity of your vehicle's rugged drivetrain. This simple service ensures your gears are properly lubricated and protected, ready for thousands of miles of on-road reliability and off-road adventure.
Remember the key takeaways from this guide: always use the correct fluid type for your specific model - especially the critical 75W-140 synthetic for second-gen 4WD rear differentials - and always use new gaskets for a leak-free seal. Adhering to the proper torque specifications prevents damage to the differential housing and ensures the plugs stay put. By following these steps, you've done the job just as a professional would.
Now that you've tackled the differentials, you're well-equipped to handle other essential drivetrain services, like changing the transfer case fluid or transmission fluid. Regular, hands-on maintenance is the best way to keep your Nissan Xterra dependable, capable, and ready for whatever journey lies ahead.
Want to know more about your Xterra maintenance? Read it in our Complete DIY Maintenance Guide for Nissan Xterra (2000-2015) article.