How to Replace Spark Plugs on a Xterra (Step-by-Step)
Step-by-step spark plug replacement for all Nissan Xterra engines (2000-2015): correct NGK plug and gap specs, 14-22 ft-lb torque, and coil removal tips.

One-tap dark, screen-awake, step-by-step reading for hands-on work.
How to Replace Spark Plugs on a Nissan Xterra (Step-by-Step Guide)
The Nissan Xterra is a legendary SUV, known for its rugged durability and off-road prowess. Keeping it running at peak performance is key to unlocking its full potential, whether you're navigating city streets or tackling a remote trail. One of the most critical DIY maintenance tasks that directly impacts engine health, fuel economy, and power is a spark plug replacement. While it might sound intimidating, changing the spark plugs on your Xterra is a very manageable job for the home mechanic with the right tools and guidance.
This comprehensive guide will walk you through every step of a Nissan Xterra spark plug replacement. We'll cover the differences between the first-generation (2000-2004) and second-generation (2005-2015) models, including their unique engine configurations. From the 2.4L inline-four to the popular 3.3L and 4.0L V6 engines, you'll find the correct specifications, tool recommendations, and pro tips needed to get the job done right.
A fresh set of spark plugs can restore lost power, smooth out a rough idle, and even improve your gas mileage. By following these instructions, you'll not only save money on shop labor but also gain a deeper understanding of your vehicle's inner workings. Let's get those wrenches turning and give your Xterra the tune-up it deserves.
Why Spark Plug Replacement Matters for Your Xterra
Before diving into the "how-to," it's important to understand why this maintenance is so crucial. Spark plugs are the small but mighty components responsible for igniting the air-fuel mixture in your engine's cylinders. This controlled explosion is what creates the power to move your vehicle. Over time, the electrodes on the plugs wear down, foul with deposits, and the gap between them can widen, leading to a weak or inconsistent spark.
When your spark plugs are failing, your Xterra will often give you clear warning signs. Ignoring them can lead to poor performance and potentially damage other ignition components.
Need help with Xterra maintenance schedules and procedures? Our detailed DIY Maintenance Guide for Nissan Xterra (2000-2015) covers all the essentials.
Common Symptoms of Worn Spark Plugs:
- Rough or uneven idle
- Difficulty starting the engine
- Noticeable decrease in acceleration and power
- Worsening fuel economy (MPG)
- Engine misfires, which can trigger a flashing Check Engine Light (codes P0300-P0306)
Benefits of Installing New Spark Plugs:
- Smoother, more stable engine performance at idle and under load
- Restored throttle response and acceleration
- Improved fuel efficiency
- Reduced harmful emissions
- Enhanced engine reliability and longevity
Essential Tools and Materials
Having the correct tools on hand before you begin is the secret to a smooth and frustration-free job. The Nissan Xterra doesn't require many highly specialized tools, but a few key items, like a torque wrench and a swivel extension, are non-negotiable for doing the job correctly and safely.
- Ratchet Wrench: A 3/8" drive ratchet is ideal for providing the right balance of torque and access.
- Extensions: A set of 3/8" drive extensions, including a 3", 6", and 10" bar, will be necessary.
- Spark Plug Socket: A 5/8-inch (16mm) 6-point spark plug socket with a rubber insert to grip the plug is essential.
- Universal/Swivel Joint: A swivel or "wobble" adapter is highly recommended, especially for the V6 engines.
- Torque Wrench: A 3/8" drive torque wrench capable of accurately measuring in the 14–22 ft·lb range is mandatory to prevent damage to your engine's cylinder head.
- Socket/Wrench for Coil Bolts: A 10mm socket or wrench is needed to remove the ignition coil mounting bolts.
- Spark Plug Gap Tool: A feeler gauge or wire-style gapper to verify the gap on your new plugs.
- Compressed Air or Vacuum: To clean out debris from the spark plug wells before removal.
- Safety Gear: Protective gloves and safety glasses.
- New Spark Plugs: The correct number and type for your specific Xterra engine (see table below).
- Dielectric Grease: A small tube to apply inside the coil boots for a moisture-proof seal.
- Anti-Seize Compound (Optional): Modern plugs are often pre-coated and do not require it. If you choose to use it, apply a very thin layer to the threads only.
Nissan Xterra Spark Plug Specifications by Engine
Using the correct spark plug with the proper gap and tightening it to the manufacturer's specified torque is critical. Using the wrong part or overtightening can lead to poor performance or catastrophic engine damage. The specifications vary slightly between the different engines offered in the Xterra over its lifespan.
Refer to this table to find the exact requirements for your vehicle.
| Engine | Model Years | Plugs Needed | Recommended OEM-Style Plug | Spark Plug Gap | Torque Spec |
|---|---|---|---|---|---|
| 2.4L KA24DE (I4) | 2000–2004 | 4 | NGK BKR5EIX-11 (Iridium) | 0.039"–0.043" (1.0–1.1 mm) | 14–22 ft·lb |
| 3.3L VG33E (V6) | 2000–2004 | 6 | NGK PFR5G-11 (Platinum) | 0.039"–0.043" (1.0–1.1 mm) | 14–22 ft·lb |
| 3.3L VG33ER (V6 Supercharged) | 2002–2004 | 6 | NGK PFR6G-11 (Platinum) | 0.039"–0.043" (1.0–1.1 mm) | 14–22 ft·lb |
| 4.0L VQ40DE (V6) | 2005–2015 | 6 | NGK DILFR5A11 (Laser Iridium) | ~0.044" (1.1 mm) | 14–22 ft·lb |
Important Note: Always verify the part number with your vehicle's VIN if possible. While the plugs listed are popular and correct-spec replacements, manufacturers can have running changes.
Step-by-Step Nissan Xterra Spark Plug Replacement Guide
With your tools gathered and specs confirmed, it's time to get to work. Remember to always work on a cool engine to prevent burns and to avoid issues with heat-expanded metal. The golden rule of this job is to work on one cylinder at a time from start to finish. This prevents mixing up ignition coils and ensures you don't accidentally drop anything into an open cylinder.
Step 1: Preparation and Access
First, park your Xterra on level ground and ensure the engine is completely cool. Disconnect the negative terminal from your vehicle's battery for safety. Next, remove any plastic engine covers or air intake ducting that obstructs access to the ignition coils on top of the engine. Before you remove any coils, use compressed air or a shop vacuum to thoroughly clean the area around the spark plug wells. This is a critical step to prevent dirt, sand, or small rocks from falling into the combustion chamber when you remove the old plug.
Step 2: Remove Ignition Coils and Old Plugs
The process here differs slightly depending on your engine.
- For the 2.4L I4 (KA24DE): The four ignition coils are in an easily accessible row. Unplug the electrical connector from the coil you are working on. Use a 10mm socket to remove the single bolt holding the coil in place. Gently twist and pull the coil straight up and out of the spark plug well.
- For the 3.3L V6 (VG33E/ER): These engines have three coils on each side. The driver's side is straightforward. The passenger side is tighter, with the rearmost plug (cylinder #6) being notoriously difficult to access. It sits deep under the intake plenum. You will need a long extension and a swivel joint to reach the coil bolt and the spark plug itself.
- For the 4.0L V6 (VQ40DE): The driver's side coils are easy to reach. The passenger-side coils are partially blocked by the intake manifold. While some mechanics remove the manifold for easier access, it can be done with the right combination of extensions and a wobble/swivel socket. Gently wiggle the coil to maneuver it out from under the manifold.
Once the coil is removed, attach your 5/8" spark plug socket to an extension and your ratchet. Lower it into the well and seat it firmly on the plug. Turn counter-clockwise to loosen the plug. If it feels excessively tight, stop. You can apply a small amount of penetrating oil around the plug, let it sit for 15 minutes, and try again. Once broken loose, you should be able to unthread it the rest of the way by hand.
Step 3: Inspect Old Plugs and Prep New Ones
Lift the old spark plug out and take a moment to inspect its tip. The color and condition are clues to your engine's health. A light tan or grayish color is normal. A black, sooty tip can indicate a rich fuel mixture, while a white or ashy tip can signal a lean condition or overheating.
Now, take your new spark plug and verify its gap using your feeler gauge. Even "pre-gapped" plugs can be jostled during shipping. Gently adjust if necessary. If you choose to use anti-seize, apply a very thin film to the threads, avoiding the electrode and ground strap.
Step 4: Install New Spark Plugs
This is the most delicate step. To avoid cross-threading the soft aluminum cylinder head, always start threading the new plug by hand. Place the new plug in the socket and carefully lower it into the well. Turn the extension with your fingers for at least 3-4 full rotations until it is snug. It should turn smoothly with little resistance.
Once it's finger-tight, attach your torque wrench and tighten the plug to the final specification.
Torque Specification for All Xterra Engines: 14–22 ft·lb (19–30 Nm)
Do not guess on the torque. Over-tightening can strip the threads in the head or crack the plug's ceramic insulator, leading to very expensive repairs.
Step 5: Reinstall Coils and Final Checks
Apply a small dab of dielectric grease to the inside of the coil boot. This prevents corrosion and helps seal out moisture. Place the ignition coil back over the newly installed spark plug, pressing down firmly until you feel it seat onto the plug's tip. Reinstall the 10mm retaining bolt and snug it down (do not over-tighten). Reconnect the electrical connector, ensuring it clicks into place.
Repeat this entire process for each of the remaining cylinders, one at a time. Once all plugs and coils are reinstalled, double-check that all connectors are secure. Reinstall the air intake ducting and any engine covers you removed. Finally, reconnect the negative battery terminal. Start your Xterra - it should fire up immediately and settle into a smooth, steady idle.
Pro Tips & Tricks for a Flawless Job
A little extra care goes a long way. Use these tips from experienced mechanics to ensure your spark plug replacement is successful and stress-free.
- The "One-at-a-Time" Rule: We can't stress this enough. Completing the entire process for one cylinder before moving to the next is the single best way to prevent mixing up coils, which would cause a misfire.
- Mastering the Tricky Plugs: For the infamous cylinder #6 on the 3.3L V6 or the passenger-side plugs on the 4.0L V6, a combination of a 6" extension, a swivel joint, and a 3" extension often provides the perfect angle to reach the plug without removing other components.
- Don't Guess on Torque: 14-22 ft·lb is not very tight. It's about a quarter-turn past finger-tight. Using a torque wrench is the only way to be certain you've done it correctly and haven't put your engine at risk.
- Read Your Old Plugs: Don't just toss the old plugs. Line them up in order of their cylinders and examine them. This free diagnostic check can alert you to underlying issues like a leaking valve cover gasket (oil on the plug threads) or a fuel injector problem before they become major headaches.
Nissan's Recommended Replacement Interval
Thanks to modern long-life iridium and platinum spark plugs, you don't have to perform this service very often. According to Nissan's official maintenance schedule, the recommended interval is quite generous.
For both first-generation V6 and second-generation 4.0L V6 Xterra models, Nissan specifies a spark plug replacement interval of 105,000 miles or 84 months, whichever comes first.
The interval for the 2.4L four-cylinder engine is similar, but it's always best to consult your owner's manual for the exact schedule. Keep in mind that this is for normal driving conditions. If you frequently tow heavy loads, do a lot of off-roading, or spend most of your time in stop-and-go city traffic, you may want to consider replacing your plugs sooner, perhaps around the 80,000-90,000 mile mark, as a preventative measure.
Frequently Asked Questions (FAQ)
1. Why should I replace the spark plugs on my Nissan Xterra?
Replacing spark plugs ensures optimal combustion, restores lost engine power, smooths idle, improves fuel economy, and prevents misfires or further ignition system damage.
2. What tools do I need to replace spark plugs on my Xterra?
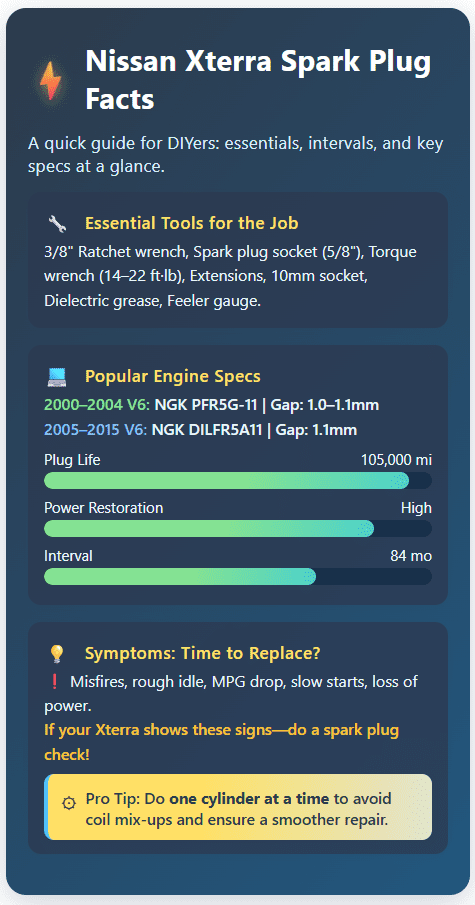
Essential tools include a 3/8" ratchet wrench, spark plug socket (5/8"), torque wrench (14–22 ft·lb range), various extensions, 10mm socket, dielectric grease, and a feeler gauge.
3. What is the spark plug replacement interval for a Nissan Xterra?
For most Xterra models, Nissan recommends replacing spark plugs every 105,000 miles or every 84 months, whichever comes first.
4. What are the correct spark plugs and gaps for Xterra engines?
2000–2004 V6 engines use NGK PFR5G-11, gap 1.0–1.1mm; 2005–2015 V6 engines use NGK DILFR5A11, gap ~1.1mm. Always verify for your VIN.
5. What are the signs of worn or failing spark plugs?
Symptoms include rough idle, engine misfire, hard starting, decrease in power, and reduced fuel efficiency. A flashing Check Engine Light may indicate misfires.
6. Any special tips to avoid mistakes when changing my spark plugs?
Work on one cylinder at a time, use a torque wrench, clean plug wells before removal, and inspect old plugs for clues on engine health.
DIY Spark plug replacement on your Xterra - Summary
Replacing the spark plugs on your Nissan Xterra is a rewarding and cost-effective maintenance project that has a direct impact on your vehicle's performance and reliability. By taking your time, using the correct tools, and meticulously following the torque and gap specifications for your engine, you can confidently complete this job in your own driveway. This simple tune-up ensures your engine is firing on all cylinders, ready for whatever adventure lies ahead.
You've not only saved a significant amount on labor costs but also invested in the long-term health of your Xterra's engine. Now that you know the process, gather your parts and tools, set aside a few hours, and give your rig the power and efficiency it was designed for. A smooth-running engine is your reward for a job well done.