Xterra Clutch Replacement: The DIY Guide
DIY clutch replacement for manual Nissan Xterras: the 2nd-gen VQ40DE under-spec issue, part selection by engine, flywheel advice, and torque specs.

One-tap dark, screen-awake, step-by-step reading for hands-on work.
Nissan Xterra Clutch Replacement: The Complete DIY Guide
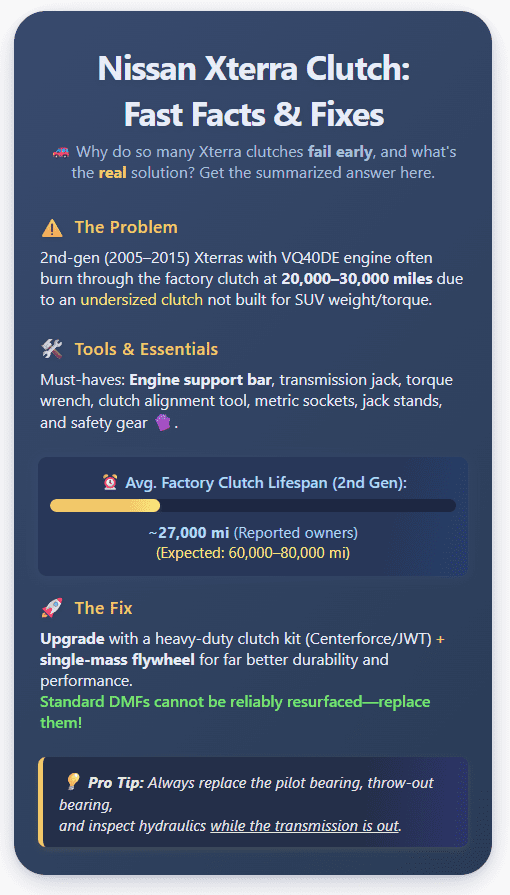
If you're the proud owner of a manual Nissan Xterra, you know it’s a rugged, capable SUV built for adventure. However, especially for those with the second-generation (2005-2015) model, you might also be familiar with a frustratingly common problem: premature clutch failure. Many owners report burning through their original clutch in as little as 20,000 to 30,000 miles, a far cry from the lifespan you'd expect from such a tough vehicle. This isn't just bad luck; it's a known issue with a specific root cause.
The good news is that you don't have to be at the mercy of frequent, costly shop visits. With the right parts, the right tools, and a solid plan, you can tackle this job yourself and install a clutch system that’s far more durable than the original. This comprehensive guide will walk you through every step of the Nissan Xterra clutch replacement process, from understanding the problem to choosing the best upgraded parts and executing the installation like a pro. Whether you're driving a first-gen with a tired clutch or a second-gen with the notorious VQ40DE engine, we've got you covered.
The Root of the Problem: Why Do Nissan Xterra Clutches Fail Early?
The widespread reports of early clutch failure aren't just a coincidence; they point to a fundamental design choice, particularly in the 2005-2015 Xterras equipped with the 4.0L VQ40DE engine and 6-speed manual transmission. While official data shows an average failure around 69,000 miles, the flood of owner complaints about clutches failing at a fraction of that mileage tells the real story.
The prevailing theory, widely supported by the enthusiast community and mechanics, is that Nissan equipped the powerful and heavy Xterra with an undersized clutch. Specifically, it's believed they used the same smaller-diameter clutch assembly found in the much lighter 350Z sports car. This component simply lacks the clamping force and surface area to handle the torque and weight of the SUV, especially during towing, off-roading, or even just spirited daily driving.
The Bottom Line: The VQ40DE-powered Xterra's clutch is widely considered under-specced from the factory. The heavy chassis and powerful engine overwhelm the 350Z-derived clutch, leading to accelerated wear and premature failure. This is why upgrading to a heavy-duty aftermarket kit is not just a performance modification, but a crucial reliability fix.
It's important to note that this chronic issue is largely isolated to the second-generation models. First-generation Xterras (2000-2004) with the 2.4L or 3.3L engines did not suffer from the same widespread premature wear problems.
Essential Tools & Equipment for Your Xterra Clutch Job
This is a significant undertaking that requires more than just a basic socket set. Having the right tools is non-negotiable for doing the job safely and correctly. Before you even think about ordering parts, make sure your garage is equipped with the following:
- Engine Support Bar or Hoist: You must support the engine's weight when the transmission and its crossmember are removed. An overhead engine support bar is ideal.
- Transmission Jack: The Xterra's manual transmission is heavy and awkward. A dedicated transmission jack is the safest way to lower and raise it. A sturdy floor jack with a wide wood block can work in a pinch, but it's far less stable.
- Clutch Alignment Tool: This plastic or metal tool is essential for centering the clutch disc on the flywheel before bolting on the pressure plate. Most new clutch kits include a disposable one.
- Torque Wrench: Absolutely critical for this job. You will need a torque wrench capable of accurately tightening bolts to specifications, particularly for the flywheel and pressure plate. A 1/2" drive wrench is recommended.
- Metric Socket & Wrench Set: You'll need a comprehensive set, including deep and shallow sockets. Common sizes include 10mm, 12mm, 14mm, and 17mm. Breaker bars and extensions will be your best friend.
- Flywheel Turning Tool / Crankshaft Stopper: This tool helps you hold the engine from rotating while you loosen or tighten the flywheel and pressure plate bolts.
- Safety Gear: Don't skip this. You'll need sturdy jack stands, safety glasses, mechanic's gloves, and a dust respirator. Clutch dust can be harmful and should not be inhaled.
- Drain Pan, Funnel, and Rags: For draining and refilling the transmission fluid.
Choosing the Right Parts: A Guide by Engine Type
The parts you need will depend entirely on your Xterra's year and engine. Simply ordering a "Nissan Xterra clutch kit" isn't enough; you need to get the correct components for your specific model and consider upgrading where it counts.
Keep your Nissan Xterra in peak condition - explore our comprehensive DIY Maintenance Guide for Nissan Xterra (2000-2015) for expert tips and detailed instructions.
First Generation: 2.4L KA24DE (2000–2004)
The 4-cylinder Xterra uses a reliable setup. The original clutch is generally robust, so a quality OEM-style replacement is often sufficient unless the vehicle is heavily modified.
- Clutch Kit: Look for reputable brands like Exedy, LUK, or Aisin. These kits typically include the pressure plate, clutch disc, release bearing, and a pilot bushing. The disc diameter is approximately 240mm.
- Flywheel: This engine uses a standard single-mass steel flywheel. It can usually be resurfaced by a machine shop if it's within spec (not excessively warped or heat-spotted). If it has deep grooves or cracks, replace it.
First Generation: 3.3L VG33E / VG33ER (2000–2004)
The V6 models, especially the supercharged (VG33ER) version, benefit from a strong clutch. The stock system is decent, but if you tow or off-road, an upgrade is a smart move.
- Clutch Kit: OEM-style kits from LUK or Exedy are excellent choices for a stock replacement. For supercharged models or those seeing heavy use, consider a Stage 1 kit from a brand like Clutch Masters or ACT for increased holding power without a punishingly stiff pedal. The disc diameter is larger, around 250mm.
- Flywheel: Like the 2.4L, this uses a single-mass cast steel flywheel that can be resurfaced if it's in good condition.
Second Generation: 4.0L VQ40DE (2005–2015)
This is the model where part selection is most critical. Do not simply replace the clutch with another stock OEM unit, as you are likely to face the same premature failure again. This is your opportunity to fix the factory's shortcoming.
- Clutch Kit: Strongly consider an aftermarket upgrade. Proven options like the Jim Wolf Technology (JWT) or Centerforce Street kits offer significantly better durability and holding power without being too aggressive for a daily driver. For heavy towing or serious off-roading, you can step up to a more aggressive kit (e.g., Clutch Masters FX350), but be prepared for a stiffer pedal and quicker engagement.
- Flywheel: The VQ40DE uses a dual-mass flywheel (DMF) from the factory. These are designed to dampen vibrations but are a major failure point and cannot be safely resurfaced. It is highly recommended to replace the OEM DMF with a more durable and reliable single-mass flywheel (SMF) conversion kit. Brands like XTD offer lightweight billet steel SMFs that are a popular and effective upgrade.
Essential Supporting Components (All Models)
No matter which Xterra you have, a complete clutch job means replacing more than just the disc and pressure plate.
- Pilot Bearing/Bushing: This small bearing sits in the end of the crankshaft and supports the transmission's input shaft. It is always recommended to replace this.
- Release (Throw-out) Bearing: This is the bearing that the clutch fork pushes on to disengage the clutch. It is included in almost every new clutch kit and must be replaced.
- Clutch Hydraulics: While the transmission is out, it's the perfect time to inspect the clutch master and slave cylinders for leaks. Given the labor involved, it's cheap insurance to replace the slave cylinder, especially on higher-mileage vehicles.
- Transmission Fluid: You will need to drain and refill the transmission. Use only the correct fluid to ensure smooth shifting and long-term health.
| Xterra Generation | Engine(s) | Fluid Specification | 2WD Capacity | 4WD Capacity |
|---|---|---|---|---|
| 1st Gen (2000-2004) | 2.4L / 3.3L | API GL-4 75W-90 | ~3.0 qt (2.8 L) | ~5.4 qt (5.1 L) |
| 2nd Gen (2005-2015) | 4.0L | Nissan MTF 75W-85 | ~4.3 qt (4.0 L) | ~4.5 qt (4.2 L) |
Step-by-Step Nissan Xterra Clutch Replacement Procedure
This is a detailed process. Read through all the steps before you begin to familiarize yourself with the workflow. Work slowly, stay organized, and prioritize safety above all else.
1. Preparation & Safety
- Park the vehicle on a flat, level surface and engage the parking brake. Chock the rear wheels.
- Disconnect the negative terminal of the battery.
- Safely lift the front of the vehicle and support it securely on jack stands placed on the frame rails.
- Place your engine support bar or hoist in position to hold the engine.
2. Draining & Disconnecting Components
- Place a drain pan under the transmission and remove the drain plug to drain the gear oil.
- Inside the vehicle, remove the shifter knob and console trim to access and detach the shift lever assembly.
- From underneath, remove any splash shields or skid plates blocking access to the transmission.
- For 4WD models: Disconnect the front and rear driveshafts from the transfer case and axles. Mark their orientation with a paint pen to ensure correct re-phasing upon installation.
- For 2WD models: Disconnect only the rear driveshaft.
- If necessary, disconnect the front section of the exhaust pipe to allow the transmission to tilt down.
3. Disconnect Linkages & Wiring
- Support the transmission with your transmission jack.
- Unbolt and remove the transmission crossmember.
- Disconnect the hydraulic line from the clutch slave cylinder. Be prepared for some fluid spillage. It's often easier to unbolt the slave cylinder and tie it out of the way, leaving the hydraulic line attached.
- Unplug all electrical connectors from the transmission and transfer case. This includes the reverse light switch, speed sensor, and any 4WD position sensors. Label them to avoid confusion.
- Detach any ground straps connected to the bellhousing.
4. Remove the Transmission
- With the transmission fully supported by the jack, remove all the bellhousing bolts that attach it to the engine. They can be hard to reach, especially the top ones.
- Once all bolts are out, carefully pry and wiggle the transmission backward to slide the input shaft out of the clutch disc.
- Slowly and carefully lower the transmission down and out from under the vehicle. This is a two-person job if you don't have a transmission jack.
5. Clutch & Flywheel Removal
- With the transmission gone, you'll see the pressure plate bolted to the flywheel.
- Loosen the pressure plate bolts evenly in a star pattern to avoid warping it. Once loose, remove the bolts, the pressure plate, and the clutch disc.
- Inspect the pilot bearing in the crankshaft. Use a puller to remove it.
- Use a flywheel holding tool and a breaker bar to remove the large bolts holding the flywheel to the crankshaft. Remove the flywheel.
6. Install New Components
- Clean the mating surface on the crankshaft.
- Gently tap the new pilot bearing into place using a socket that matches its outer diameter.
- Install your new flywheel (single-mass is recommended for the VQ40DE). Use new flywheel bolts and tighten them to the factory torque specification in a star pattern.
- Place the new clutch disc against the flywheel. It is often marked with "flywheel side."
- Use your clutch alignment tool to hold the disc perfectly centered.
- Position the new pressure plate over the disc and start all the bolts by hand.
- Tighten the pressure plate bolts in a star pattern and in stages. A typical Nissan spec is an initial pass at 10–20 N·m, followed by a final pass at 22–29 N·m. Verify the exact spec for your model.
- Once the pressure plate is torqued, you can remove the alignment tool.
7. Reinstall the Transmission
- Install the new release (throw-out) bearing onto the clutch fork inside the transmission's bellhousing.
- Carefully raise the transmission back into position. You may need to rock it or rotate the output shaft flange slightly to get the input shaft splines to align with the new clutch disc.
- Once the transmission is seated flush against the engine, reinstall all the bellhousing bolts and torque them to spec.
- Reinstall the transmission crossmember, starter motor, and all wiring and linkages.
8. Bleed the Clutch Hydraulics
- Reconnect the slave cylinder and its hydraulic line.
- Fill the clutch master cylinder reservoir with fresh DOT 3 brake fluid.
- Bleed the system by having a helper pump the clutch pedal a few times, hold it down, and then you open the bleeder screw on the slave cylinder to release air and old fluid. Repeat until no air bubbles emerge and the pedal feels firm. A vacuum or pressure bleeder makes this a one-person job.
9. Finalize and Test
- Reinstall the driveshafts, ensuring your alignment marks line up.
- Reinstall the exhaust components if they were removed.
- Fill the transmission with the correct type and amount of new gear oil.
- Reinstall the shift lever, console, and interior trim.
- Reconnect the battery.
- Start the engine and test the clutch. The pedal should feel smooth and engage/disengage cleanly. Check for any fluid leaks.
Troubleshooting Common Post-Replacement Issues
Even with a careful installation, you might run into a few snags. Here's how to troubleshoot the most common ones.
- Clutch Won't Disengage (Grinds When Shifting): This is almost always caused by air in the hydraulic system. Re-bleed the clutch thoroughly. It can also be caused by an incorrectly installed clutch disc (backwards) or a defective part.
- Clutch Chatter or Shudder: This is often a sign of a contaminated clutch disc (oil or grease on the surface) or a warped flywheel. If you reused and resurfaced your old flywheel, it may be out of spec.
- Spongy or Low Pedal: This is another classic symptom of air in the hydraulic lines. Bleed the system again. A failing master or slave cylinder can also cause this.
- Engine "Rev Hang" (4.0L VQ40DE): If you notice the engine RPMs hang for a moment after you press the clutch, this is normal. It's a feature of the electronic throttle programming and not a mechanical fault. Adjust your shifting style to be a bit more deliberate to accommodate it.
Tips & Tricks for a Flawless Clutch Job
Here are a few extra pieces of advice from seasoned mechanics to help your project go smoothly and ensure a long-lasting repair.
- Cleanliness is Critical: The surfaces of the new clutch disc and pressure plate must be completely free of oil, grease, or any other contaminant. Handle them with clean gloves and wipe down the flywheel and pressure plate surfaces with brake cleaner before installation.
- Replace, Don't Reuse Supporting Parts: This job is 90% labor. While the transmission is out, it's the absolute best time to replace inexpensive but critical wear items. Always install a new pilot bearing and release bearing. Seriously consider a new slave cylinder, and inspect rear main engine seal and transmission input shaft seal for leaks.
- Torque is Not a Suggestion: Do not guess the tightness of the flywheel and pressure plate bolts. Use a quality torque wrench and follow the factory specifications precisely. Over-tightening can warp components, and under-tightening can lead to catastrophic failure.
- The "While You're In There" Check: With the transmission and driveshafts out, you have unparalleled access to other components. Inspect your U-joints for play, check your engine and transmission mounts for cracks or deterioration, and look for any other potential issues.
FAQ
- Q: Why do Nissan Xterra clutches fail early, especially in the second generation?
A: The 2005–2015 Nissan Xterra often experiences premature clutch failure because Nissan equipped it with a smaller clutch assembly, originally used in the 350Z sports car. This part is under-specced for the Xterra’s heavier chassis and higher torque, causing excessive wear and short lifespan compared to expectations. - Q: What is the best solution for premature clutch failure in a 2nd-gen Nissan Xterra?
A: The best fix is to upgrade to an aftermarket heavy-duty clutch kit (such as those from Jim Wolf Technology or Centerforce) and replace the factory dual-mass flywheel (DMF) with a more reliable single-mass flywheel (SMF). This greatly increases the durability and performance of the clutch system. - Q: Can I just resurface the original Nissan Xterra dual-mass flywheel?
A: No, it’s not recommended. Dual-mass flywheels cannot be safely resurfaced, as their internal mechanism and design are prone to failure. Instead, replace the DMF with a robust SMF conversion kit during clutch replacement. - Q: What tools are essential for performing a Nissan Xterra clutch replacement?
A: Key tools include an engine support bar, transmission jack, clutch alignment tool, torque wrench, comprehensive metric sockets, jack stands, safety glasses, and gloves. Proper tools are critical for safety and successful installation. - Q: What parts should always be replaced during a clutch job on any Xterra?
A: Always replace the pilot bearing, throw-out (release) bearing, and inspect/replace the slave cylinder and master cylinder if needed. Also, drain and refill the transmission with the specified fluid. - Q: How can I avoid common mistakes when replacing a Nissan Xterra clutch?
A: Focus on cleanliness, use a torque wrench for all key bolts, thoroughly bleed the hydraulic system, and double-check component orientation. Replacing inexpensive wear parts while the transmission is out will help prevent future issues.
Conclusion - Replacing the clutch
Replacing the clutch in your Nissan Xterra is a challenging but incredibly rewarding DIY project. It puts you in control of your vehicle's reliability and saves you a significant amount of money on labor costs. By understanding the inherent weakness in the second-generation models and choosing to upgrade to a robust aftermarket clutch and single-mass flywheel, you're not just repairing your Xterra - you're making it better and more durable than it was when it left the factory.
Take your time, stay organized, and prioritize safety. Gather all the necessary tools and high-quality parts before you start turning wrenches. By following this guide, you can confidently restore your Xterra's driveline, giving you a clutch that can finally keep up with the adventurous spirit of the vehicle itself. Now, get out there and enjoy the peace of mind that comes with a job well done.