Xterra Differential Breather Modification - How To DIY
DIY guide to relocating Nissan Xterra differential breather vents into the engine bay to stop water and mud ingestion off-road. Covers 2000-04 and 05-15.

One-tap dark, screen-awake, step-by-step reading for hands-on work.
Nissan Xterra Differential Breather Modification: Your Ultimate Guide to Preventing Water Damage
The Nissan Xterra is a legendary off-road platform, built to conquer rugged trails, muddy paths, and the occasional stream crossing. While its robust drivetrain can handle immense stress, it has one critical vulnerability that can lead to catastrophic failure: the factory differential breathers. Taking your Xterra through water or mud without addressing this weak point is like leaving the door wide open for expensive, trip-ending damage.
Every time you venture off-road, your differentials heat up. Plunge that hot axle into cool water or mud, and a rapid cooling effect creates a powerful vacuum. The stock breather vents, located low on the axle housing, are not designed to handle this. Instead of breathing air, they will literally suck in water, mud, and grit, contaminating your gear oil and silently destroying the sensitive gears and bearings within.
Fortunately, there is a simple, inexpensive, and essential fix: the differential breather modification. This guide will walk you through every step of relocating your Xterra's breathers to a high, dry location, effectively giving your axles a snorkel. By investing a little time and a few dollars now, you can prevent thousands in future repairs and ensure your Xterra is truly ready for any adventure.
What Are Differential Breathers and Why Do They Fail?
Understanding this modification starts with knowing what a differential breather does. As your differential works, the gear oil inside heats up and expands. The breather is a small, one-way valve that allows this expanding air to escape, preventing pressure from building up and blowing out your axle seals. However, its design creates a major problem when off-roading.
The Dangers of Water and Mud
The factory breather vent on your Xterra sits directly on top of the axle housing, just inches above the ground. It's designed to let air out, but not to prevent anything from getting in under suction. Here's the dangerous sequence of events:
- Heating Up: As you drive, especially in 4WD, your differential gets hot.
- Rapid Cooling: You drive through a creek, a deep puddle, or a mud bog. The cold water instantly chills the metal differential housing.
- Vacuum Effect: The air and oil inside contract rapidly, creating a strong vacuum that the stock breather valve and axle seals cannot resist.
- Contamination: Water, mud, and debris are sucked directly into the differential through the vent, immediately contaminating the gear oil.
If the vent gets clogged with mud, the problem reverses. Pressure builds up with no escape, eventually forcing gear oil out past your axle seals, leading to leaks and component failure from oil starvation.
Crucial Takeaway: The stock breather location is the primary cause of water contamination in the Nissan Xterra's differentials. Relocating the vent is not just an upgrade; it's essential preventative maintenance for any owner who takes their vehicle off-pavement.
The Consequences of Water Contamination in Your Differential
Ignoring a water-logged differential is a recipe for disaster. Once water mixes with gear oil, it forms a milky, acidic sludge that loses all its lubricating properties. This sets off a chain reaction of destruction that can quickly sideline your vehicle.
Before you find yourself stranded with a blown rear end, understand the severe consequences of water ingress:
- Gear Oil Contamination: The oil turns into a worthless, emulsified sludge that cannot protect metal components.
- Bearing and Gear Damage: The water causes immediate corrosion, pitting the surfaces of the ring and pinion gears and destroying the bearings. This leads to whining noises and, eventually, total failure.
- Blown Axle Seals: If the breather is clogged, internal pressure will find the next weakest point—your axle seals. A blown seal will leak gear oil all over your brakes and can lead to a costly axle rebuild.
- Catastrophic Drivetrain Failure: Ultimately, the corroded gears will shatter, leaving you stranded. A complete differential rebuild or replacement can cost thousands of dollars, far more than the simple cost of this preventative modification.
Tools and Materials You'll Need for the Mod
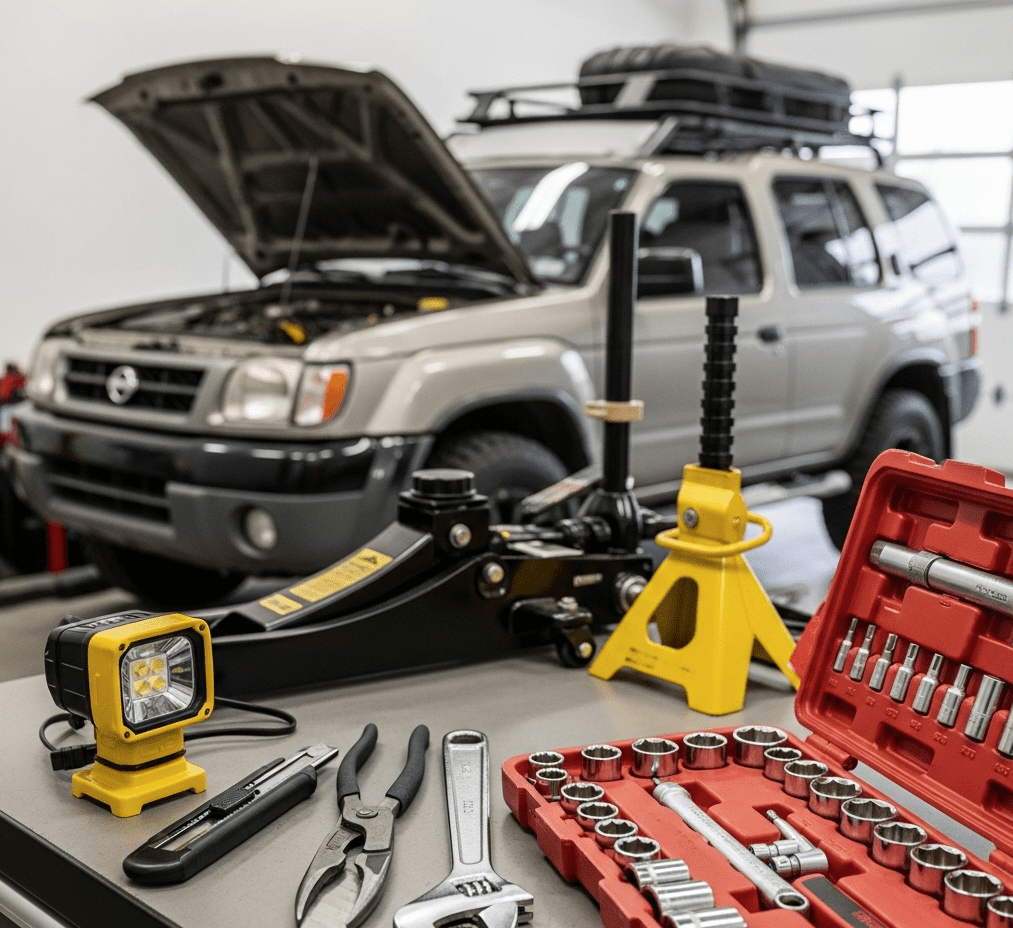
The good news is that this is a very approachable DIY project. Before you crawl under your Xterra, gather these common tools and materials to make the job go smoothly.
Essential Tools
- Basic hand tools: Pliers, an adjustable wrench, and a socket set.
- Jack and jack stands (or ramps) for safe access under the vehicle.
- Utility knife or sharp scissors to cut the hose.
- Flashlight or headlamp.
- Optional: Drill and bits if you need to create a new mounting point.
Required Materials
- Vacuum Hose: You'll need about 6-8 feet of 1/4" or 5/16" inner diameter (ID) reinforced vacuum or fuel line per differential. It's better to have extra than not enough.
- Hose Clamps: Small worm-drive hose clamps to secure the new line to the differential fitting.
- Zip Ties: Plenty of heavy-duty zip ties to securely route the new hose along the frame.
- Breather Fitting (Optional but Recommended): For a rock-solid connection, use a barbed fitting. The Nissan OEM part #38323-C6010 is a perfect fit for many Xterra axles.
- Breather Filter (Optional): A small fuel filter or a dedicated breather filter for the end of the hose can help keep dust and debris out.
| Item | Specification | Why it's Needed |
|---|---|---|
| Hose | 1/4" or 5/16" ID Vacuum/Fuel Line | Creates the extended "snorkel" for the diff to breathe through. |
| Clamps | Small Worm-Drive Style | Securely fastens the hose to the differential nipple or fitting. |
| Fitting | Nissan Part #38323-C6010 | Provides a threaded, barbed connection for maximum security. |
| Filter | Small PCV/Fuel Filter | Prevents dust and insects from entering the open end of the hose. |
Aftermarket Kit Options
If you prefer an all-in-one solution, several companies offer complete kits. Brands like Z1 Off-Road and Alldogs Offroad sell pre-packaged kits for Nissan trucks that include the hose, fitting, clamps, and instructions, taking the guesswork out of sourcing parts.
Step-by-Step Guide: Installing Your Xterra Diff Breather Extension
This process is straightforward and can be completed in an afternoon. The steps are nearly identical for both 1st Gen (2000-2004) and 2nd Gen (2005-2015) Xterras, with minor differences in the front differential setup.
Step 1: Locate the Factory Breathers
First, you need to find the stock breathers on your axles. Make sure your vehicle is safely supported on jack stands or ramps before getting underneath.
- Rear Differential: On both 1st and 2nd Gen models, the rear breather is a small metal nipple with a wobbly plastic or metal cap located on the top of the differential "pumpkin," typically on the driver's side. Clean the area around it thoroughly to prevent dirt from falling into the diff.
- Front Differential (4WD Models):
- On a 1st Gen Xterra, the front breather is similar to the rear—a small cap on the driver's side of the front differential housing.
- On a 2nd Gen Xterra, Nissan partially addressed the issue. There is already a rubber hose connected to the front diff that runs up toward the firewall. Your job will be to extend this existing line even higher.
Step 2: Remove the Stock Breather and Attach the New Hose
With the breather located, you're ready to make the connection.
- Remove the Stock Cap: Gently pry the old breather cap off the nipple using a flathead screwdriver or pliers. It should pop right off. If you have a threaded valve, unscrew it.
- Attach the New Line: You have two options for connecting your new hose:
- Simple Clamp-On Method: Slide your new 1/4" or 5/16" hose directly over the metal nipple on the differential. Secure it tightly with a worm-drive hose clamp. This is the quickest method and works well for most.
- Barbed Fitting Method (Recommended): Unscrew the entire stock breather nipple from the axle housing. Thread in your new barbed fitting (like the Nissan #38323-C6010). Push the new hose over the barb and secure it with a hose clamp for a connection that will never pop off.
Step 3: Route the Extended Hose
The goal is to run the hose to the highest, driest point possible—typically high in the engine bay.
- Rear Differential Routing: Run the hose from the rear axle forward along the frame rail. Use zip ties every 12-18 inches to secure it to existing brake lines or wiring harnesses. Keep it away from the hot exhaust pipe and any moving suspension components. A popular route is up the passenger-side frame rail and into the engine bay near the firewall.
- Front Differential Routing: On a 2nd Gen, simply connect your new hose to the end of the factory hose and continue routing it higher into the engine bay. On a 1st Gen, run the new hose directly from the front diff up into the engine bay, securing it away from steering components and the engine block.
- Termination Point: The best locations to end the hose are high on the firewall, near the top of a shock tower, or behind the windshield washer reservoir. Ensure the open end is protected from direct rain and splash.
Step 4: Secure the Hoses and Finalize the Installation
Properly securing the hose is critical to prevent it from getting snagged on the trail or damaged by heat.
- Use Plenty of Zip Ties: Don't be shy. A loose hose can get caught on a branch or melt on the exhaust.
- Protect from Heat: If your routing path takes you near the exhaust, use heat-reflective tape or slide a piece of split loom over the hose for extra protection.
- Install a Filter: At the open end of the hose in the engine bay, attach a small breather filter or simply create a downward-facing loop in the hose to prevent water and debris from falling in.
- Check Your Fluid: This is a perfect opportunity to check your differential fluid. If it looks milky, change it immediately.
Tips & Tricks for a Bulletproof Installation
Take your mod from good to great with these pro tips.
- Combine Mods to Save Time: If you're doing the rear differential, do the front differential (and even the transfer case) at the same time. You're already under the truck, so you might as well make all your driveline components water-tight in one go.
- Perform a Fluid Change: The best time to do this mod is during a scheduled differential fluid change. This allows you to inspect the old fluid for signs of previous water contamination and start fresh with a fully protected system.
- Label Your Lines: If you route multiple breather lines into the engine bay (front diff, rear diff, transfer case), use colored zip ties or a label maker to identify each one. This will make future diagnosis and maintenance much easier.
- Use a Barbed Fitting for Peace of Mind: While clamping a hose over the stock nipple works, using a threaded barbed fitting like Nissan part #38323-C6010 creates a much more secure, fool-proof connection that won't vibrate loose or pop off under pressure on the trail.
How to Test and Verify Your New Breather Mod
Don't just assume the mod is working. A few simple checks will give you the confidence to tackle that next water crossing without worry.
Initial Checks
- Airflow Test: Before securing the final end, gently blow into the hose. You should be able to hear or feel air moving freely without obstruction. A kinked or blocked line defeats the purpose of the mod.
- Leak Check: After installation, take a short drive to warm up the differential. Park the vehicle and inspect the new connection at the axle for any signs of weeping gear oil. Also, check your axle seals to ensure pressure is being properly vented.
The Real-World Test
The true test comes on the trail.
- First Water Crossing: The next time you encounter water, take it slow.
- Post-Trip Inspection: After your trip, check your differential fluid. Crack the fill plug and let a small amount of oil drip out onto your finger or into a clean container. The oil should be clear and translucent. If it looks like coffee with cream or is milky and opaque, you still have a leak somewhere that needs to be addressed.
- Signs of Success: Clean fluid, no new leaks, and a dry-running drivetrain are the signs of a successful installation. Your differential is now protected from its biggest enemy.
FAQ - Xterra differential breather Problems and fixes
- Q: What is a differential breather and why does it matter on the Nissan Xterra?
A differential breather is a small, one-way valve that allows expanding air to escape from the differential, preventing pressure buildup. On the Xterra, the factory breather is poorly placed, allowing water and mud in during off-road use, which can cause severe damage. - Q: What happens if water gets into my Xterra’s differential?
Water mixes with gear oil, creating a harmful sludge that destroys bearings and gears, leading to costly repairs. - Q: How does the differential suck in water during off-roading?
When a hot differential hits cold water, it rapidly cools, creating a vacuum that can suck water and debris in through the low-mounted factory breather. - Q: What are the symptoms of water-contaminated differential oil?
Oil becomes milky and opaque, the gears may whine, seals may leak, and eventually catastrophic failure can occur if ignored. - Q: What tools and materials do I need for the breather mod?
Basic hand tools (pliers, wrenches, socket set), jack stands, vacuum/fuel hose (1/4" or 5/16" ID), hose clamps, zip ties, and optionally a barbed fitting and breather filter. - Q: Can I buy a kit for the breather mod?
Yes, complete kits are available from vendors like Z1 Off-Road and Alldogs Offroad, which include everything needed for the job. - Q: Where should I route the extended breather hose?
Run it from the differential up to a high, dry spot in the engine bay, securing it away from heat sources and moving parts, and ending it with a filter or looped downward to prevent debris entry. - Q: Should I do the front and rear differential breathers together?
Yes, it’s best to do both (and even the transfer case) at the same time for thorough protection when you’re already working under the vehicle. - Q: How can I test if my breather mod was successful?
Blow gently through the new hose to confirm airflow, and check after driving for leaks and clear, clean oil in the differential. - Q: Is the differential breather mod really necessary for all Xterra owners?
Absolutely, especially for those who go off-road or drive through water or mud. It’s cheap insurance against catastrophic drivetrain damage.
Conclusion: A Must-Do Mod for Every Xterra Owner
The Nissan Xterra is a formidable off-road machine, but its low-mounted differential breathers are a significant Achilles' heel. Leaving them in their stock location is an open invitation for water, mud, and expensive mechanical failures. For the cost of a few feet of hose and an hour of your time, you can permanently solve this problem.
By relocating your differential breathers, you are investing in the long-term health and reliability of your drivetrain. This simple, effective modification provides invaluable peace of mind, transforming your Xterra from a capable SUV into a truly resilient adventure vehicle ready to take on any terrain.
Don't wait for a milky fluid change or a grinding noise from your rear axle to take action. Tackle this essential project before your next off-road excursion and drive with the confidence that your differentials are safe, sealed, and ready for whatever the trail throws your way.