Xterra Off-Road Mods & Accessories: Setup Guide
The definitive Nissan Xterra off-road build guide: lift kits, tires, skid plates, bumpers, lighting, recovery gear, and terrain setups for 2000-2015.

Nissan Xterra Off-Road Mods & Accessories: Ultimate Trail Setup Guide
The Nissan Xterra has earned a reputation as a rugged, adventure-ready 4×4, right from its off-road-oriented naming (licensed from the XTERRA triathlon series) and marketing tagline “Everything You Need, Nothing You Don’t.” It’s a body-on-frame SUV with a stout V6 engine, solid rear axle, and up to 4WD that made it a 2006 4×4 of the Year. Stock Xterras already offer roughly 9–10 inches of ground clearance, especially the Pro-4X off-road edition with ~10″ of lift. Enthusiasts have since built on this foundation with off-road mods and accessories to unlock even more trail capability.
This guide covers all major Nissan Xterra off-road mods – from suspension and tires to protection, lighting, storage, recovery gear, tech, and interior upgrades. We break things down by category and priority, giving step-by-step examples, product placeholders (with model compatibility), and tips on installation, performance impact, and maintenance. Budget vs. premium options are compared, and we include special sections on terrain-specific setups (desert, forest, rock) and legal/insurance factors for U.S. and Canada. By the end, you’ll have a complete roadmap to building the ultimate off-road Xterra rig in 2025.
Why trust us? We show our work, cite it, and tailor everything to the Xterra - so you can build right the first time.
- Xterra-specific, not generic 4×4 advice. We organize fitment and how-tos by generation (WD22: 2000–2004, N50: 2005–2015) so you don’t mix parts or torque specs across years.
- Primary sources, always. Specs and procedures are cross-checked against Nissan factory service manuals, TSBs, and the manufacturers’ install guides; we link sources and flag assumptions.
- Trade-offs quantified. We call out impacts on CV angles, bump-stop contact, shock travel, curb weight, approach/departure, braking, alignment, MPG, and maintenance load - so you know what you gain and what you give up.
- Real fitment guidance. Clear compatibility tables (tire sizes, backspacing/offset, lift heights, UCA/trim needs) with model-year notes and “rubs/clearance” callouts.
- Safety and legality first. We reference FSM torque values, recovery best practices, and note DOT/SAE lighting and regional lift/bumper rules (U.S./Canada).
- No pay-to-play. Recommendations are merit-based; affiliate links (when used) are disclosed and never change rankings.
- Kept current. Content is reviewed on a regular schedule and updated when products or rules change.
Suspension Upgrades: Lift Kits, Shocks & Springs
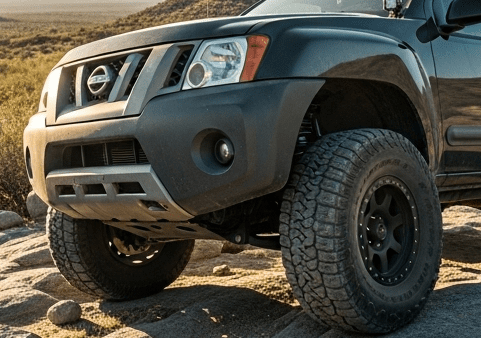
Raising and stiffening the suspension is often the first and most impactful mod for off-road Xterra owners. A lift kit increases ground clearance and wheel travel, while heavy-duty shocks and springs improve ride control. Typical lifts range from 2–4 inches for moderate trail use, up to 6 inches or more for serious overlanding or rock crawling.
For example, Dobinsons offers a “2.0″ Medium-Load Suspension Kit for the 2005–2015 Xterra (VQ40DE), which includes new springs and shocks to raise the vehicle. ReadyLIFT sells a 2.5″ SST lift kit for 2005+ Xterras. Premium kits (like ARB Old Man Emu or King) provide better ride and adjustability than basic budget kits (e.g. Rancho or Rough Country).
Typical lift-install steps include:
- Jack up the vehicle and remove wheels.
- Disconnect sway bar end-links, shocks, and spring retainers. Remove old springs (coil or leaf) and shocks.
- Install spacers or new springs, along with extended shocks or struts. (Coilovers or strut spacers go on front; leaf springs or coils in rear.)
- Reinstall brake lines and sway links. Replace any extended brake lines if needed.
- Torque all bolts to spec and re-assemble.
The tools required are extensive. A lift kit install often calls for: a hydraulic jack and sturdy jack stands, a spring compressor (if reusing coils), assorted metric sockets and wrenches, a torque wrench, pry bars, mallets, and even cutting tools for some cases. Z1 Off-Road’s install instructions (Revision 2025) for a 05–15 Xterra kit list “hydraulic jack, (2) 2-ton jack stands, ratchet, assorted metric sockets & wrenches, torque wrench, hammer, Loctite,” etc.
The same instructions warn that “installer must have thorough knowledge of automotive systems” and recommend consulting a professional if unsure. In other words, lift installs are moderate-to-high difficulty – plan on several hours (or a full weekend) and possibly professional help for large lifts.
Difficulty & Safety: DIYers should treat lift installs as serious projects. If not comfortable with springs under tension or cutting factory components, seek a shop. After initial install, double-check all fasteners with a torque wrench. Always re-torque control arms, track bars, and wheel lug nuts after the first few hundred miles. Z1’s manual cautions “Read instructions completely before starting… torque fasteners to proper specifications.”
Ride & Handling Impact: Adding a lift raises the Xterra’s center of gravity and changes alignment/gears. A higher vehicle can feel more “floaty” and turn more slowly. However, high-quality lift systems (like ARB/Old Man Emu) are engineered to minimize negative effects.
ARB’s notes say a properly designed suspension addresses changes in handling and driveline angles caused by lifting. In practice, expect slightly increased body roll and a firmer ride after a big lift. You may need to adjust sway bar stiffness or add aftermarket bars. Also consider re-gearing the axle: larger tires can slow acceleration and mis-calibrate the speedometer unless the final drive ratio is changed (see “Drivability Impact” below).
Step-by-Step Example (2″ Coil Lift):
- Prep: Park on level ground. Disconnect battery (for airbag safety). Lift vehicle with jack stands under frame.
- Remove Wheels: Take off wheels to access suspension.
- Detach Sway & Brakes: Unbolt sway bar end-links and disconnect ABS sensor wires if needed. Remove brake caliper or line from shock if it hangs.
- Remove Shocks & Springs: Unbolt shock absorber bottom, spring perches (or shock spacers). Carefully compress and remove the old coil spring or leaf pack.
- Install Lift Components: Insert new spring spacer or spring (carefully, releasing compressor). Replace shocks with longer performance shocks.
- Reassemble: Bolt everything back, installing any provided brackets. Use Loctite on stud threads. Attach brake lines/ABS to shock.
- Final Steps: Reinstall wheels, torque lugs. Remove jack stands and carefully lower the vehicle. Perform an alignment.
Install Tools Checklist: Hydraulic jack, 2× heavy-duty jack stands, metric socket/wrench set (10–19mm), torque wrench, spring compressor, pry bars, mallet, Loctite (thread locker).
Example Product (Model Fitment): Dobinsons offers a 2.0″ Medium-Load Lift Kit for 2005–2015 Xterra (fits VQ40DE V6, 4WD). It includes front 2.0″ coil springs and struts and 2.0″ rear leaf springs. (Other examples: ReadyLIFT 2.5″ front/2.0″ rear kit for 2005+, ARB 3.0″ OME kit for off-road models, etc.)
Tires & Wheels for Terrain Types
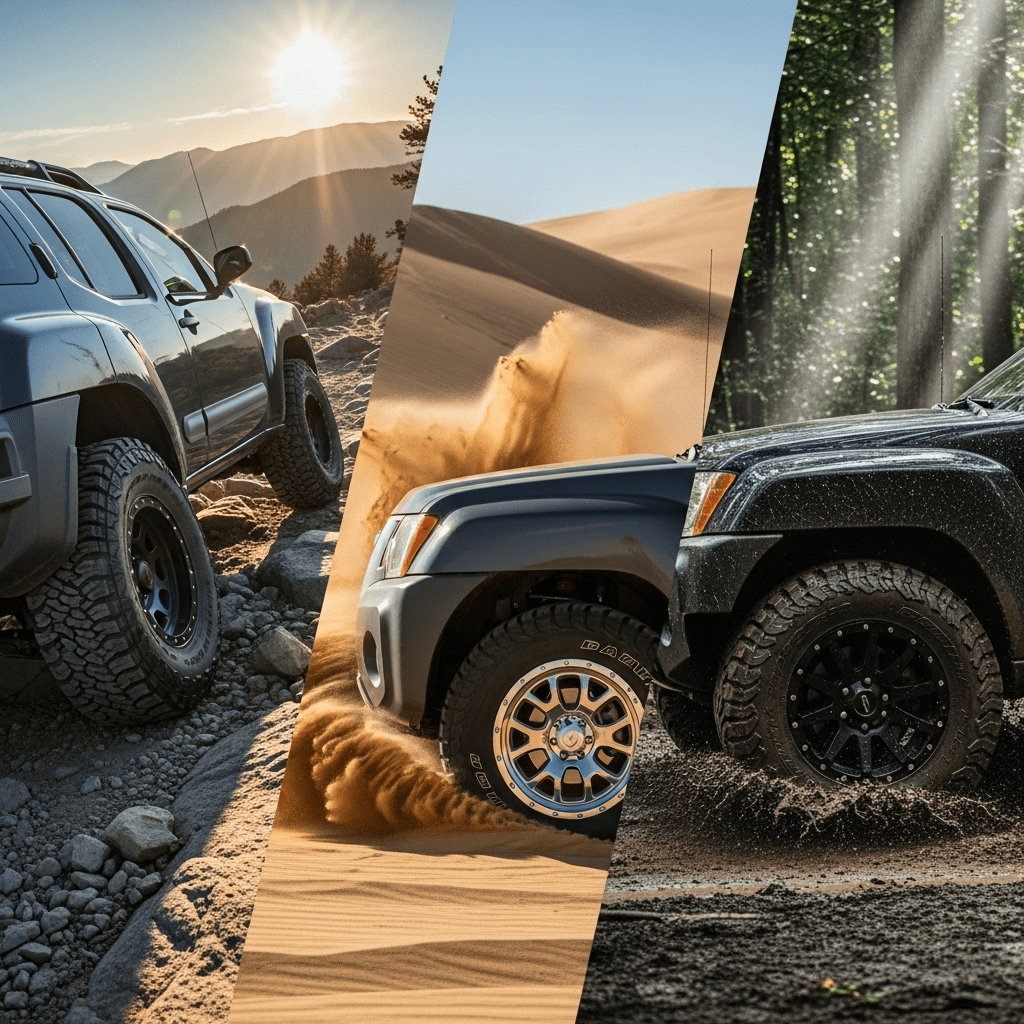
Tires are arguably the most critical mod for off-roading. The right tire-and-wheel combo turns the added suspension space into real traction on sand, mud, rocks or forest. Xterra owners commonly upsize from stock 16″ or 17″ wheels to fit larger off-road tires. A popular choice is 31–33″ diameter tires (e.g. 285/75R16 or 265/70R17) with moderate lift, or even 35″+ (like 315/75R16) on a 3–4″ lift. For example, many Off-Road Xterra 4WD models originally came with 265/75R16 tires. Owners often bump that to 285/75R16 (roughly 33″ tall) for more clearance.
Choose tire type by terrain:
- All-Terrain (AT): A versatile workhorse, AT tires (e.g. BFGoodrich All-Terrain KO2, General Grabber AT2) balance on-road manners with off-road grip. ATs have smaller tread blocks than mud tires, so they ride quieter and improve fuel economy. As Discount Tire explains, “if you drive more on road than off, all-terrain tires are likely a better option”. AT tires also work year-round (better snow traction than mud tires).
- Mud-Terrain (MT): For deep mud, sand, or aggressive off-road use, MT tires have large lugs and self-cleaning tread. They bite into loose surfaces but are noisy, harsher ride, and can reduce MPG. MT tires “provide unrivaled off-road traction” and reinforced sidewalls, but “are noisy on paved roads” and wear faster. Use MTs if you frequently run muddy trails or need maximum traction.
- Rock Crawling Tires: If tackling extreme rock crawling, consider tires rated for rock terrain (some brands like BFGoodrich KM3 or Mickey Thompson Baja Boss). Often these are specialized MT designs with extra sidewall protection. Wide, low-pressure tires also help grip rocks.
Tire Sizing & Wheels: Stock Xterra wheels were mostly 16×7″ or 17×7.5″. Upgrading wheels to 17–18″ (up to 8.5″ wide) allows fitting tall tires (33″ to 35″) without excessive rubbing. A general rule is to stay within about 35″ height unless you install a body lift. For example, one off-road build used 33″ BFGoodrich KO2 285/75R16 tires (with about a 2.5″ suspension lift). When choosing wheels, check bolt pattern (Xterra is 6×114.3) and offset – many prefer moderate offset (ET 15–30) for a stable stance. Narrow wheels and tires can be better in thick mud or snow for more pressure per square inch.
- Air Pressure: Adjust tire pressure to match terrain: lower for sand and rocks (better traction), higher for highway. Many Overlanders install an onboard air compressor to re-inflate after trails.
- Beadlocks & Spacer: For serious rock crawling, beadlock wheels allow airing very low without tire unseating. While not common on Xterras, a spacer kit (wheel spacers) can push wheels out for more stability if needed (but beware undue stress).
Stock Size Example: A 2005 Xterra Off-Road model was originally equipped with 265/75R16 tires (~31″ tall). A common upgrade is 285/75R16 (≈33″) on stock wheels with minimal lift. To go to 35″ (≈315/75R16), you’d typically need 3–4″ lift plus trimming of fenders or a mild body lift.
Terrain-Specific Tire Advice:
- Desert/Sand: Wide, fat tires for floatation (e.g. 33″+ ATs), aired down low. Consider sand-specific tires like BFGoodrich Baja T/A.
- Forests/Trails: All-Terrain for mixed surfaces; narrower tires to dodge trees, plus mud tires if muddy. Good sidewall protection is a plus.
- Rock Crawling: High-traction MT tires with strong sidewalls (e.g. KM3). Stick with single tires around 33–35″ on a robust lift.
- Snow/Winter: Although Xterra isn’t AWD, winter tires can be useful for trails in deep snow. Otherwise, an aggressive AT or mud tire with deep siping is better than summer rubber.
Fuel Economy Impact: Larger, aggressive tires hurt MPG. One analysis notes that heavy off-road tires “increase rolling resistance” and account for a 15–35% fuel-economy penalty, depending on speed. Combined with lift-induced drag (see below), expect noticeable mileage reduction. Proper tire inflation and re-gearing can mitigate some loss.
Example Products (Model Fitment): A sample tire upgrade might be “285/75R16 BFGoodrich All-Terrain T/A KO2” (fits 2005+ Xterra with ~2.5″ lift) or “35×12.5R17 Mickey Thompson Baja Pro (set of 4)” (for 2000–2015 with 4″ lift and trimmed fenders). In wheels, brands like Method Race Wheels or Black Rhino make rugged 17″ styles for Xterra (6×114.3 bolt pattern).
Protection: Skid Plates, Rock Sliders & Bumpers
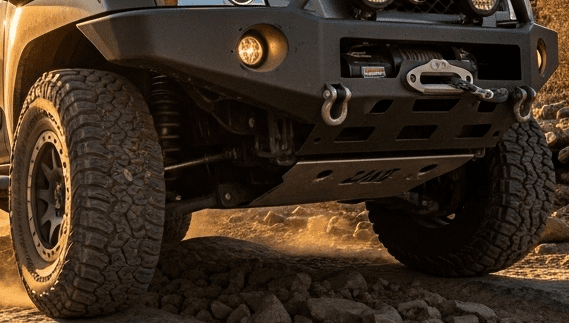
Off-road trails are full of hazards. Exposed components like the oil pan, transmission, and fuel tank are vulnerable to rocks and stumps. Underbody armor and bars are essential. A typical protection package includes skid plates (full or partial), rock sliders, and off-road bumpers with winch mounts.
- Skid Plates: These are steel or aluminum plates bolted under the chassis to protect the oil pan, transfer case, fuel tank, and differentials. Aftermarket kits usually cover all critical areas. For example, a “Complete Set of Skid Plates” for 2005–2015 Xterra includes a front skid plate, a fuel tank skid, and a transmission/transfer-case skid (all 1/4″ aluminum). These bolt into factory mount points. High-end models use thick steel for rock crawling; lighter aluminum is fine for mild trails.
- Rock Sliders/Rails: These tubular steel bars run along the rocker panels to prevent body damage when sliding over rocks. Rock sliders double as rock support so the wheels can slide up on obstacles without denting the cab. They also often serve as a step for cabin access. A robust slider bolts to the frame and can support the vehicle’s weight if suspended. (Even vehicles with bumpers often use sliders for side protection.)
- Off-Road Bumpers: Stock plastic bumpers offer little protection. Aftermarket bumpers (e.g. steel or aluminum) provide strong mounting points for winches and lights, and protect the front/rear ends. For example, ARB’s 2005–2015 Xterra steel bumper “fully replaces the factory bumper” with a purpose-built mount. It retains the factory tow points, adds mounts for lights/antenna, and is airbag-approved. Smittybilt and Steelcraft also make sturdy Xterra bumpers with winch plates. Rear steel bumpers similarly protect the fuel tank and add D-ring mounts.
Install Difficulty: Skid plates and bumpers bolt on relatively easily (basic wrenches and torque). Rock sliders can be more involved: you may need to unbolt body mounts or install frame brackets. In any case, measure twice before drilling. Aftermarket bumpers may require trimming plastic fenders or relocating sensors (ARP’s ARB bumper needs 1156 LEDs for turn signals). Always follow the manufacturer’s hardware kit.
Maintenance: Regularly inspect for bent or loose skid plates and torn sliders. Re-torque bumper mounts after rough trails. Skid plates may dent or scratch; check for leaks after a hard hit.
Example Products: Shown examples include a full underbody skid kit (3-piece aluminum) and an ARB steel front bumper (parts #3438270). Many premium overlanders fit both a steel ARB bumper up front and heavy Rock Sliders on the sides, plus a matching rear bumper. Mid-budget builds often go with a steel aftermarket bumper (Smittybilt Gen2, etc.), a set of rock rails (like Z1 Off-Road sliders), and perhaps engine/transfer-case skids (e.g. Monster Skid Plates for Xterra).
Lighting & Visibility
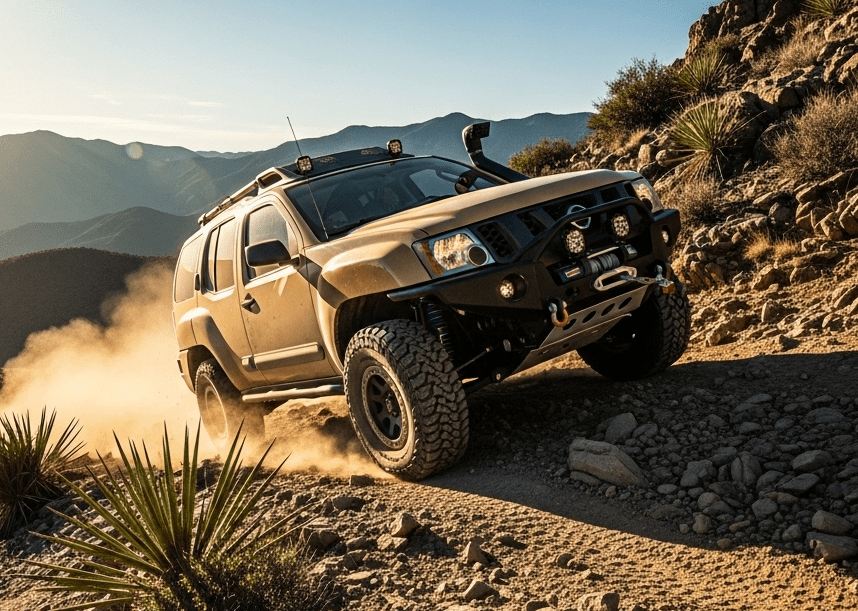
Nighttime and low-visibility driving are where extra lighting really pays off. Popular lighting upgrades for Xterras include LED light bars, auxiliary driving/fog lights, and cabin or rear lights for camping. Modern LED lights have far more output per watt than old halogens, so you can flood the trail with bright white light without overloading the electrical system.
- LED Light Bars: These are long, rectangular bars (10″–50″) typically mounted on the roof rack or bumper. They contain dozens of LEDs and come in flood, spot, or combo beam patterns. For example, Sylvania’s “Ultra 50” off-road LED bar (50″) produces ~19,440 lumens of 6500K light. In practice, a good 50″ bar on the roof can illuminate hundreds of feet ahead. Shorter bars (e.g. 20–30″) can mount on the bumper or A-pillars. Light bars require strong brackets; many kits come with roof or hood mounts. Remember, very bright bars on high beams can blind oncoming traffic – use responsibly and in off-road mode.
- Auxiliary Driving & Fog Lights: Xterra fog housings can be upgraded to LED pods. Diode Dynamics sells a SS3 LED Fog Kit (3″ pods) for 2005–2015 Xterra, which is a direct replacement and SAE-compliant. These drop into the factory fog light slots and vastly outshine stock halogens. Other options include 4″ or 6″ LED cube lights mounted to the bumper or A-pillars. Use flood-pattern LEDs for wide fill light (good near trails) or spot/throw pattern for distant illumination. Yellow or amber lenses can improve contrast in fog.
- Interior/Cargo Lighting: Upgraded interior lighting (LED dome lights) and rear cargo lights (such as Lumen LED tail gate lamps) make life easier at camp. Some add grill-mounted “reverse spotlights” to improve rear visibility. In-bed truck lights or roll cage lights (if you add a roll hoop) can be nice for night work.
Installation: LED bars and pods usually come with wiring harnesses (often sold separately). Use proper fuse/relay kits. Avoid cheap Chinese lights that may not be waterproof. Aim lights carefully: spot beams should aim level or down to avoid blinding, flood beams aim slightly downward. If adding a light bar on the roof, you may need to remove headliner trim to run the wire to the battery or switch.
Performance Note: A big light bar can draw 10–20 amps, so plan wiring accordingly. Many upgrade the alternator or add a second battery if running multiple high-power accessories (see “Electrical” below, if needed).
Storage & Cargo Systems
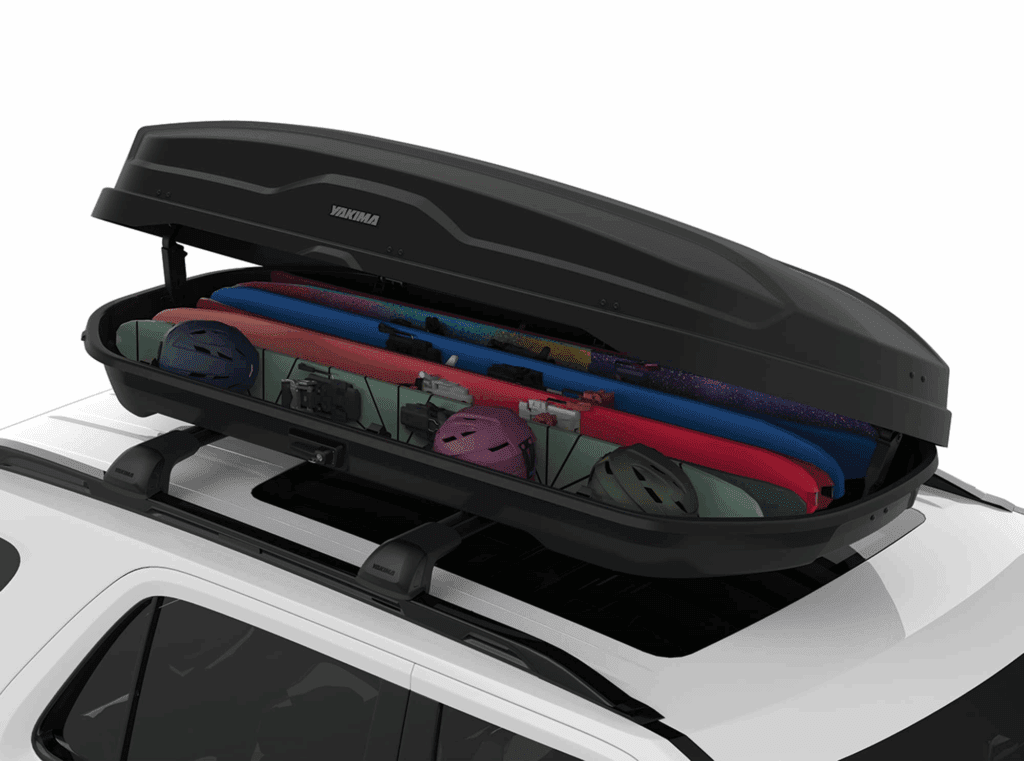
An Xterra off-roader needs organized cargo space for gear, camping kit, and overlanding equipment. Key storage mods include roof racks, cargo drawers and boxes, and interior organizers:
- Roof Racks & Carriers: A sturdy roof rack lets you carry cargo bags, rooftop tents, fuel/water cans, and long gear (skis, lumber, ladders, etc.). Options include metal racks (e.g. Gobi, Rhino-Rack Pioneer, ARB Safari bars) or DIY trays. For example, Gobi Xterra racks (2005–2015) bolt on and provide a flat deck with integrated side rails. These often exceed 100 lbs loading, but check roof load ratings (~150 lbs static) to avoid collapse.
- Cargo Drawers & Boxes: Inside the rear cargo area, a lockable drawer system (like Front Runner or ARB) lets you store tools, recovery gear, and food securely. Folded gear (camp chairs, sleeping bags) often go on top. Heavy items should be low in the vehicle to preserve handling. You might also use durable duffels (like Yeti Panga) or plastic totes that fit the rear footwell.
- Interior Organizers: Seat-back organizers, overhead consoles, and dash mount trays can keep maps, tools, and electronics in reach. Many add a dashboard switch panel or phone mount (see “Tech” below). Upgrading the stock stereo head unit to a modern one with Apple CarPlay/Android Auto can improve on-road usability and navigation.
- Cargo Nets & Straps: Install anchor points and cargo nets to secure loose items in the back. A roll cage (OEM or cage bars) provides additional tie-down points and supports rooftop tents or lighting.
Example Gear: For storage, a common setup is an ARB Intensity Rooftop Tent, two 5-gallon jerry cans (Galls) mounted on a Bed Rack, and an Engel 50L fridge in the back. Tools like a Mil-Spec Cargo Drawer or SafePack system keep recovery straps and tent poles organized.
Recovery Gear & Mounting
Every off-roader should carry a basic recovery kit. A few well-chosen tools can be lifesavers when stuck. Essentials include:
- Winch: A front-mounted winch with synthetic rope (8,000–12,000 lbs) can pull the vehicle out of tough spots. Many Xterra builds add a Warn or Smittybilt winch on the steel bumper.
- Recovery Straps & Shackles: A kinetic recovery rope (or snatch strap) and D-ring shackles allow pulling vehicles with a buddy. Carry at least one 20–30 ft tow strap and a pair of 3/4″ bow shackles. Mark these for safety pin orientation.
- Traction Boards: Lightweight recovery boards (e.g. Maxtrax, TRED Pro) provide grip in mud, sand, or snow. These stack easily on a roof rack or tailgate.
- Shovel & Hi-Lift Jack: A trail shovel and a Hi-Lift jacking tool help dig around tires or lift the vehicle on unstable ground. Mount Hi-Lift on the rear bumper or swing-away carrier.
- Tire Repair Kit: Plug kit and portable inflator (or CO₂ cans) to fix punctures.
- Communication: See next section, but always have a way to call for help (radio or satcom).
Mounting these items for quick access is key. For example, many rigs add a Hi-Lift jack mount on the front bumper or tailgate, attach a shovel/axe bracket on the roof rack side rails, and strap traction boards to the roof rack or hood. Our checklists often include placards or diagrams.
Recovery Checklist Table:
| Item | Purpose | Example Mount/Placement |
|---|---|---|
| Winch (8–12k lbs) | Self-recovery pulling | Front bumper, frame-mounted |
| Tow/Recovery Straps | Vehicle-to-vehicle pull | Stored inside, with shackles |
| D-Ring Shackles | Attachment for straps | Secured to bumper loops |
| Traction Boards | Sand/mud traction aid | Roof rack or tailgate |
| Hi-Lift Jack | Lifting vehicle/traction | Rear bumper or underseat mount |
| Shovel (collapsible) | Digging/drainage | Roof rack or side brackets |
| Tire Plug Kit | On-trail flat repair | Glovebox or console pocket |
| (Optional) CB Radio | In-vehicle comms | Dash or overhead mount |
Tools & Tips: Practice using the winch and tools in non-critical situations. Always use a winch dampener (blanket) on the cable while operating. When self-recovering, anchor straps to proper points (frame or D-rings) – NEVER use tow balls. Regularly check straps and gear for wear.
Communication & Navigation Tech
Staying connected and on-route is crucial off the grid. Popular communication/navigation upgrades include:
- GPS Handheld or In-Dash Navigator: Dedicated off-road GPS units (Garmin Overlander, Garmin Tread/TOPO) come with topographic maps and trail navigation. Many drivers also use smartphone apps (Gaia GPS, Avenza, OnX Offroad) with offline maps via a tablet or phone.
- Satellite Messenger: Devices like the Garmin inReach allow 2-way texting and SOS via satellite when cell service is unavailable. The inReach can “send and receive messages via satellite” and has an interactive SOS to a 24/7 rescue center. Having one provides peace of mind on remote trips. (Apple iPhone 14+ also has Emergency SOS via satellite for SOS-only messaging, albeit more limited.)
- Radios: For vehicle-to-vehicle comms on trail, many Xterra groups use CB radios (27 MHz) or GMRS radios. Install a whip antenna on the bumper or roof for good range. Some overlanders add a Ham radio (amateur) setup for long-range or emergency use. Dual-band (VHF/UHF) antennas with a power module (long coax run) can cover CB/ham/GMRS.
- Dash/Rear Cameras: For safety, some fit dashcams (continuous recording) and rear backup cameras to aid in tight trails or backing up.
Installation: Mount handheld GPS units on dash brackets or use the in-dash Garmin Overlander (8″ screen). Antennas (CB/ham) need grounding; mount to bumper or roof with at least 10″ clearance from metal. Route all wires through grommets.
Safety Note: Even with high-tech gadgets, always carry physical maps and a compass as backup.
Interior & Comfort Mods
For long trips, comfort can be a make-or-break factor. Interior mods that Xterra owners often add include:
- Seat & Floor Protection: Heavy-duty seat covers (e.g. Covercraft, OxGord) protect against dirt and wear. All-weather floor mats (like WeatherTech or REM) keep the carpet clean. Some add a center console organizer to hold tools and tech.
- Fridge/Cooler: A 12V fridge in the cargo area (Engel 50L, ARB 50L, or Dometic CFX) lets you carry perishables. A dual-battery setup is often added to run the fridge and electronics without draining the starting battery.
- Interior Lighting: LED interior dome lights and footwell lighting make campsite prep easier.
- Convenience: A headrest-mounted tablet holder, rear hammock or cargo net, and upgraded stereo head unit (with Apple CarPlay) are popular. Many swap in a modern double-DIN radio for navigation and hands-free calling.
- Climate Control: Consider a windshield sunshade or seat ventilation kit for summer.
These mods don’t need external citations, but they make overlanding trips more enjoyable. Just ensure any additions don’t obstruct airbags or buckling.
Tools Checklist & Maintenance Schedule
Common Toolset: Beyond suspension tools, a well-equipped off-roader carries: metric wrenches/sockets (8–22mm), adjustable wrenches, pliers, screwdrivers, hammers, pry bars, Dremel or reciprocating saw (for trimming mounts), electrical tape and multimeter. For electrical work (lights, radios), include spare fuses, wire, connectors, and a crimping tool.
Regular Maintenance: Modifying the Xterra doesn’t replace Nissan’s maintenance schedule. In fact, sticking to a strict service plan is even more important. The Xterra’s factory maintenance schedule lists about 61 different services up to 150,000 miles. Key intervals include: oil and filter every 5,000–7,500 miles, diff and transfer case fluids ~30k–50k miles, coolant flush ~50k miles, spark plugs ~100k (for V6), and brake fluid change ~2 years. After installing mods, also:
- Re-torque suspension/steering bolts at 500 miles.
- Check wheel alignment after lift or tire changes.
- Inspect for fluid leaks (often a sign of stress on seals after lift).
- Check for pinched hoses or chafing (e.g. brake lines or wiring) after lifts/bumper installs.
Maintenance Schedule Example:
| Mileage Interval | Service/Check |
|---|---|
| 5K–7.5K mi | Oil & filter change, tire rotation |
| 15K, 30K mi | Cabin/air filters replacement |
| 30K mi | Differential & transfer case fluid change |
| 60K–100K mi | Spark plugs (if needed), valve adjust |
| Every trip | Inspect fluids, brakes, shocks, torque wheels |
Regular maintenance ensures a modded Xterra stays reliable on trips. (For routine tasks like oil changes and coolant flushes, see our Xterra maintenance guide .)
Terrain-Specific Builds
Off-roading isn’t one-size-fits-all. Tailor your mods to the primary terrain:
- Desert (Sand): Fit wide AT or desert tires and run them at low pressure for flotation. Consider a raised air intake (snorkel) or at least relocate the intake to reduce sandy dust ingestion. Skid plates for the transmission and fuel tank prevent sand wash damage. Install an onboard air compressor for airing up/down on the fly. A sunshade/awning and extra water storage are smart.
- Forest/Trails (Rocks/Wood): Emphasize rock protection: heavy skid plates, rock sliders, and steel bumpers. Durable AT or mud tires with reinforced sidewalls are ideal. A snorkel helps by keeping dust out (as one owner notes, snorkels “put the air intake up above the dust” in dry, wooded trails). Additional LED spotlights help spot obstacles through trees at dusk.
- Rock Crawling: Focus on flex and traction. Lift should be 4 inches or more with long-travel suspension (coilovers, extended arms). Very sticky tires (35″ mud-terrain) and add air lockers or limited-slip diffs. Skid plates for differentials are critical as rocks hit everywhere. Keep bumpers simple to maximize approach angles. Traction bars (long-arm setup) can help prevent axle wrap under heavy torque.
- Mud/Swamp: Mud tires, snorkel, and extended breather lines are key. Seal electricals if extreme. Carry heavy-duty recovery gear (winch, boards). Consider mud flaps and brush guards to deflect debris.
- Snow/Winter: Use winter-rated AT or snow tires. Carry traction mats (like ice cleats) and shovel. Ensure antifreeze and block heaters in cold climates.
Troubleshooting & Common Issues
No mod install is perfect on the first try. Here are some tips for typical issues:
- Speedometer/ABS Error: After installing larger tires, the speedometer (and ABS) may read slow. Reprogramming the gauge or adding a speedometer correction module solves this. Check ABS connectors – you may need to re-calibrate if the tone ring shifts.
- Steering Alignment: A lift often skews camber/caster. An alignment shop can fix washout or drifting after suspension mods.
- Brake Line/Driveshaft Fitment: Large lifts sometimes require longer brake lines or adjusting the handbrake cable. A high-mount bracket or extended brake hoses may be needed to prevent stretching at full droop. Driveshaft angles may need correction (slip yoke eliminator kit) on big lifts.
- Shock Binders: If your new shocks bind at full droop or bump, you may need spring perches or brackets. Check for rubbing on control arms or coils.
- Check Engine Light: If no tune is done, the stock ECU may throw a code for O2 sensor or gear ratio after big tire lifts. This usually requires calibration (fueling vs. height or new diff gearing).
- Electrical Gremlins: Adding accessories can cause interference or battery drain. Ground all lights well. Install switches for aux lights/air compressors, and consider a second battery or isolator for high-draw gear.
Always retest after fixes. Many kits come with tech support or forums (like XterraNation and TheNewX.org) where users share solutions to installation quirks.
Performance Impact: Before & After
Before Mods: A stock Xterra is competent off-road, but belly-scrapes on big obstacles and limited tire options hamper performance. MPG is around 15–18 city with the V6 4WD, and handling is truck-like but stable.
After Mods: Lifting and larger tires will reduce fuel economy. Experts note that lift kits (increasing frontal area) and bigger tires “can lead to increased fuel consumption”. For example, Trucks & Moore reports that “fuel efficiency often takes a hit” after lifting, due to more drag and weight. Off-road tires themselves can cost 15–35% in MPG. In practice expect a few MPG loss on highway.
However, you gain capability: more ground clearance means better approach/departure angles, less underbody damage, and access to tougher trails. Traction is vastly improved with dedicated tires. A well-sorted lift kit can maintain highway drivability: ARB notes that if engineered correctly, “properly designed suspension addresses” handling changes.
Example: A 2008 Xterra Off-Road might manage 17 mpg stock. With a 3″ lift + 33″ tires + winch + roof rack, it might drop to ~14 mpg on highway, but climb rocks and slog through mud with ease.
Budget vs. Premium Builds
Off-road Xterra setups range from very affordable to high-end. The table below compares budget and premium options for key categories, to give an idea of cost and performance differences:
| Category | Budget Upgrade Example | Premium Upgrade Example |
|---|---|---|
| Suspension | Rough Country 2.5″ coil/spacer lift (~$600) | ARB Old Man Emu 3.0″ suspension kit (~$2,000) |
| Tires/Wheels | 285/75R16 generic ATs on stock wheels (~$1,000) | 285/75R16 BFGoodrich KO2 on Method wheels (~$2,000) |
| Front Bumper | DIY tubular bumper or cheap steel bumper (~$300) | ARB steel bull bar with winch mount (~$1,500) |
| Winch | Smittybilt 9.5k synthetic rope winch (~$450) | Warn Zeon 10k synthetic ($1,100) |
| Skid Plates | Piece-by-piece steel plates (~$200) | Full aluminum skid kit (front, trans, tank) (~$800) |
| Rock Sliders | 2×2″ tube sliders (DIY or off-brand) (~$200) | Heavy-duty ARB or Z1 sliders (~$800 pair) |
| Lighting | 20″ LED bar + fog pods (~$250) | 50″ Rigid LED bar + bumper pods (~$1,000) |
| Recovery Gear | Generic tow straps, reels ($150 total) | Maxtrax boards + hi-lift + 4× D-shackles ($500) |
| Roof Rack | Used ladder rack (~$150) | Gobi or Rhino-Rack platform (~$1,200) |
| Interior | Basic seat covers, cooler ($200) | Leather covers, ARB fridge, dual battery ($2,000+) |
Note: Prices are approximate and illustrative. “Budget” setups often use mass-market brands (Rough Country, Smittybilt, generic) and DIY fabrications. “Premium” uses top brands (ARB, Warn, King, Method) with superior engineering and durability.
Upgrade Timeline & Priority
Not all mods need to be installed at once. Here’s a suggested progression:
- Stage 1 – Essential Off-Road Prep:
- Tires & wheels (upgrade to all-terrain tires)
- Suspension lift (2″–3″ kit)
- Skid plate for engine/transmission
- Basic lighting (halogen fog or small LED bar)
- Recover gear (strap, shackle, tire repair)
Goal: Increase clearance and traction for immediate trail use.
- Stage 2 – Protection & Recovery:
- Off-road front bumper (with winch)
- Rock sliders
- Snorkel (for water/dust, plus extended breathers)
- Roof rack (for gear carriage)
- Winch, hi-lift jack, traction boards (mount and secure them)
Goal: Beef up protection and recovery capability.
- Stage 3 – Comfort & Overlanding:
- Interior storage/drawers
- 12V fridge or cooler
- Additional lighting (roof LED bar, rear work light)
- Communications (radio or satellite messenger)
- Alloys with premium tires (like BFG KO2)
Goal: Equip for long trips and off-grid stays.
- Stage 4 – High-End Enhancements:
- Locking differentials or limited-slip upgrades
- Long-travel suspension or coilovers
- Premium shocks (King/FOX)
- Onboard air system
- Electronic accessories (solar panel, inverter, etc.)
Goal: Maximize capability and convenience once basics are settled.
Adjust timeline based on your goals and budget. For example, a weekender trail rig might stop at Stage 2-3, while a full expedition build goes through Stage 4+.
Legal & Insurance Considerations
Modifying your Xterra has legal and insurance implications:
- United States: Vehicle modification laws vary by state. Some states limit lift height or tire size. For example, North Dakota law restricts trucks ≤7,000 lbs to a 4″ lift and 44″ tires. Michigan forbids more than 4″ lift blocks on rear springs. In general:
- Tires: Must be DOT-approved and not exceed body clearance limits.
- Lights: Front lights must remain white or amber (some states ban blue/red on street vehicles).
- Windows: Tint limits vary; many states require front windshield/side windows above a certain % transparency.
Always check your local DMV/State Patrol guidelines.
- Canada: Provincial regulations also apply. According to Canada’s modified vehicle standards, oversized tires and wheels are allowed if they are highway-approved. However, you must keep standard lighting colors: front lamps may only be white or amber, and front window tinting is limited (back windows ok, but front/ windshield must be mostly clear). Canada also restricts body lift block size and fender coverage.
- Insurance: Inform your insurer about modifications. Insurers may not cover damages from mods if undisclosed. ThinkInsure (Canada) warns “if you do not declare car mods … you risk having your claim denied or your insurance cancelled”. Bankrate notes most mods can be covered, but “finding an insurer willing to cover modifications may take some research”. You may need a Custom Parts & Equipment (CPE) endorsement or an agreed-value policy. Mods that significantly increase performance (engine, suspension height) can raise premiums. Keep receipts for all mod costs.
In short, notify your insurance company and check state/provincial laws when planning mods. Compliance ensures your fun isn’t spoiled by fines or denied claims.
Frequently Asked Questions
Q: What are the best Xterra off-road accessories?
A: Essentials include a suspension lift kit (2–4″), larger off-road tires (AT or MT), skid plates (front, tank, trans), heavy-duty bumpers with winch, LED light bar, roof rack, and a comprehensive recovery kit (winch, straps, boards). Popular accessories are bumpers from ARB or Smittybilt, Dobinsons or OME lift kits, and BFGoodrich KO2 tires. The “best” depend on your trails – rock crawlers favor sliders and lockers, overlanders want roof racks and lights.
Q: How much lift can a stock Xterra handle?
A: Most mechanical lifts up to ~4″ can be done on a stock 4WD Xterra. Beyond 4″, components like brake lines and driveshafts may need upgrades. Many 2nd-gen Xterras run 3–4″ suspension lifts successfully. Body lift blocks (between frame and body) are also used (1–3″ blocks) to fit bigger tires without altering suspension geometry.
Q: What tire size can an Xterra fit?
A: With a modest lift (2–3″) and/or body lift, you can fit up to ~33″ tires (e.g. 285/75R16 or 265/75R17). With 4″+ lift and trimmed fenders, 35″ tires (315/75R16) are possible. Stock (no lift) Xterras came with 265/75R16 (~31″), so that’s the baseline. Always check for rub on full steering lock and suspension travel.
Q: Is a snorkel worth it on an Xterra?
A: A snorkel’s main benefit on the Xterra is dry, dust-free air intake rather than deep water fording. Owners note snorkels “put the air intake up above the dust” in dusty trails. The Xterra’s stock wading depth is only ~13″, and electronics sit high, so snorkels won’t let you dive rivers. However, for desert/off-road dust, a snorkel plus extended diff breathers helps engine health.
Q: What lift kit should I get for my Xterra?
A: It depends on use and budget. For general off-road, a 2–3″ suspension lift kit (e.g. Dobinsons, ReadyLIFT, Rough Country) is common. If you want premium ride, consider ARB/Old Man Emu (3″) or King/FOX coilovers. Body lift kits (spacers between body/frame) are cheaper but only gain about 1–3″ of tire clearance. Align your choice with planned tire size – e.g. 2.5″ lift for 31–32″ tires, 4″+ for 35″ tires.
Q: How do off-road mods affect gas mileage?
A: Expect a fuel economy drop. As one guide explains, lifting increases aerodynamic drag and larger tires add rolling resistance, so “fuel efficiency often takes a hit”. Additionally, off-road tires can cost up to a 15–35% MPG penalty compared to stock tires. Keep tires aired to spec and consider re-gearing to offset some loss.
Q: Do I need locking differentials?
A: For casual trails, limited-slip diff (Pro-4X comes stock) may suffice. For serious rock crawling, an aftermarket lockers (ARB Air Locker) is recommended to send power to both wheels. A locker lets each wheel grip independently. Installing a locker requires special tools (drilling the diff cover) and is an advanced mod.
Q: Are there any safety/legal issues?
A: Yes. Ensure lights and horn remain street-legal (front lights white/amber only). Keep mud flaps if states require them for large tires. Remember to add heavy mods to insurance. Always drive more cautiously with a higher center of gravity and heavier front end (from bumper/winch).
Q: What maintenance do mods require?
A: Inspect bolts/nuts on lifted suspension and bumpers regularly. Re-torque wheels after off-roading. Change drivetrain fluids (diffs, transfer case) on schedule. Check for rust or fatigue on added mounting brackets. Follow routine oil changes (every 5-7.5k mi) and key Xterra services (61 tasks to 150k) to keep the platform reliable.
Nissan Xterra off-road mods - That is It
Whether you’re building a basic trail Xterra or a full overland rig, this guide covers the essentials of Nissan Xterra off-road mods. For deeper dive into each topic, see our related Xterra maintenance and upgrade articles (e.g. oil change procedures, SMOD radiator fix, timing chain checks). Safe trails, and enjoy the adventures that your newly rigged Xterra will conquer!